20 Years of Loft Experience

In a previous Loft post I concluded that I didn’t need an RFID capability. So, with that question out of the way and having explored most aspects of operating a Loft system over the last 20 years or so, I’ve decided it’s time to draw some conclusions and to move this journey onto the Kcompleted list.

Key facts and figures

First, here’s a summary of the design of the system, the contexts within which it has been used, and some approximate overall statistics about its use in the 20 years between 2005 and 2025 (note that estimates have been used to compensate for errors and omissions in recording – see errors section below).

  • The system involves placing numbered Items or Containers into labelled Positions. All Positions, Items and Containers have an entry in an index.
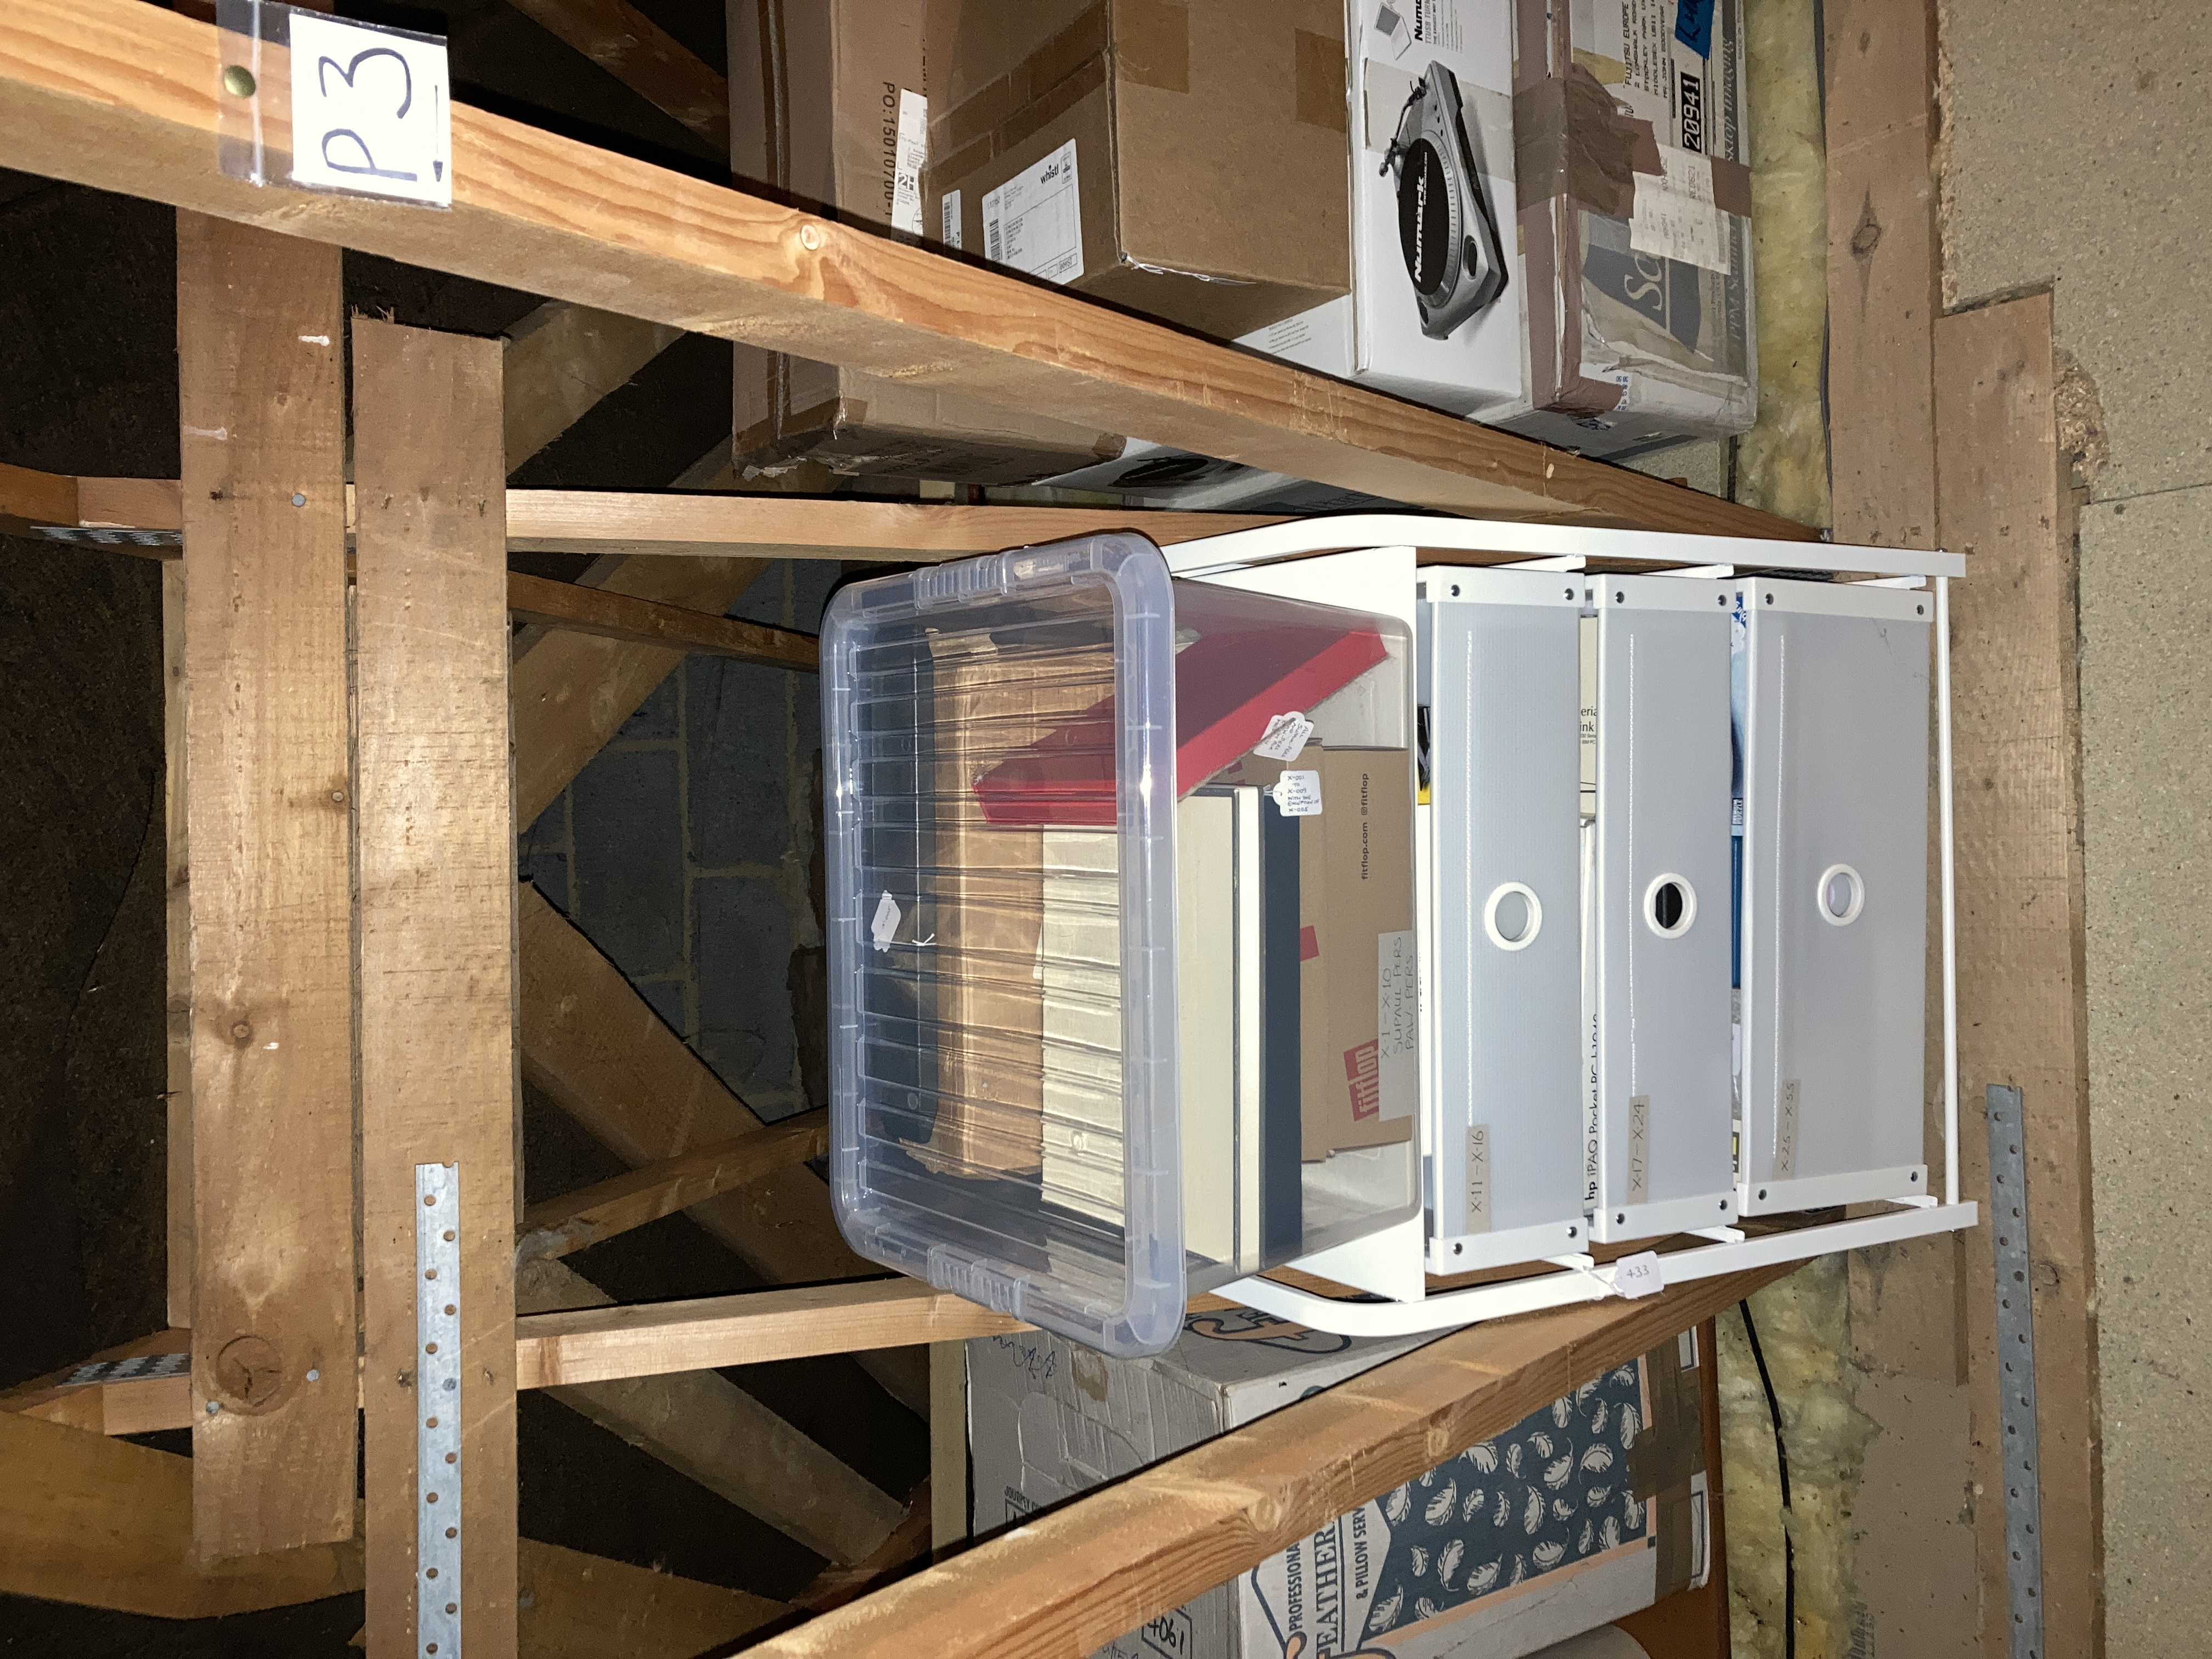
  • Lofts in two different houses have been used – both affording 32 different Positions between the rafters.
  • During the period there have been two adults living in the house, 2 teenagers growing up and leaving home, and one elderly relative staying for 6 months in the course of moving. All these individuals have contributed to the loft’s contents.
  • About 469 items were indexed of which 352 were removed after an average stay of about 5 years. The 119 items currently in the loft have been there for an average of about 9 years.
  • About 91 Containers were indexed of which 57 were removed after an average stay of 8 years. The 35 Containers currently in the loft have been there for an average of about 13 years.
  • Just 16 of the items and 10 of the Containers which were indexed when the Loft system was first setup in January 2005, continue to be present in the loft after 20 years.

What to keep and where to keep it

Although this journey has focused on Lofts, the findings can be applied to any domestic storage area – a garage, a spare room, an outhouse etc. The investigation has been about using such spaces to store items which are not in day-to-day use but which a householder wants to keep. Deciding what to keep and what to throw away is central to this activity, and I think I’ve usually erred on the side of keeping. However, I’ve also found that over a period of years I’ve changed my view on some things and disposed of them. So, a periodic review of the contents can be worthwhile.

There are some general criteria which I’ve realised are worth considering when deciding to store things in a loft, a prime one being, will it go through the loft hatch? Others are: If the object is of great sentimental value wouldn’t it be better on show in the house than buried in the loft (for example two inscribed tankards)? If the object is useful, wouldn’t it be better somewhere accessible in the house (for example spare stationery items).

I’ve also found that sometimes I’ve tended to keep things in the loft longer than needed simply because they are difficult to dispose of. For example, pieces of an expensive shelving system which we are unlikely to ever have a use for, but which we can’t find anyone who wants them and which seem too good to simply take to the dump. For such objects, I think it’s probably better to take a decision than to procrastinate for years – though that’s sometime easier said than done. Some disposal problems can be purely practical such as the need to cut up over 100 CD data disks – a task which I spaced out over several days because it hurt my hand using the heavy-duty scissors.

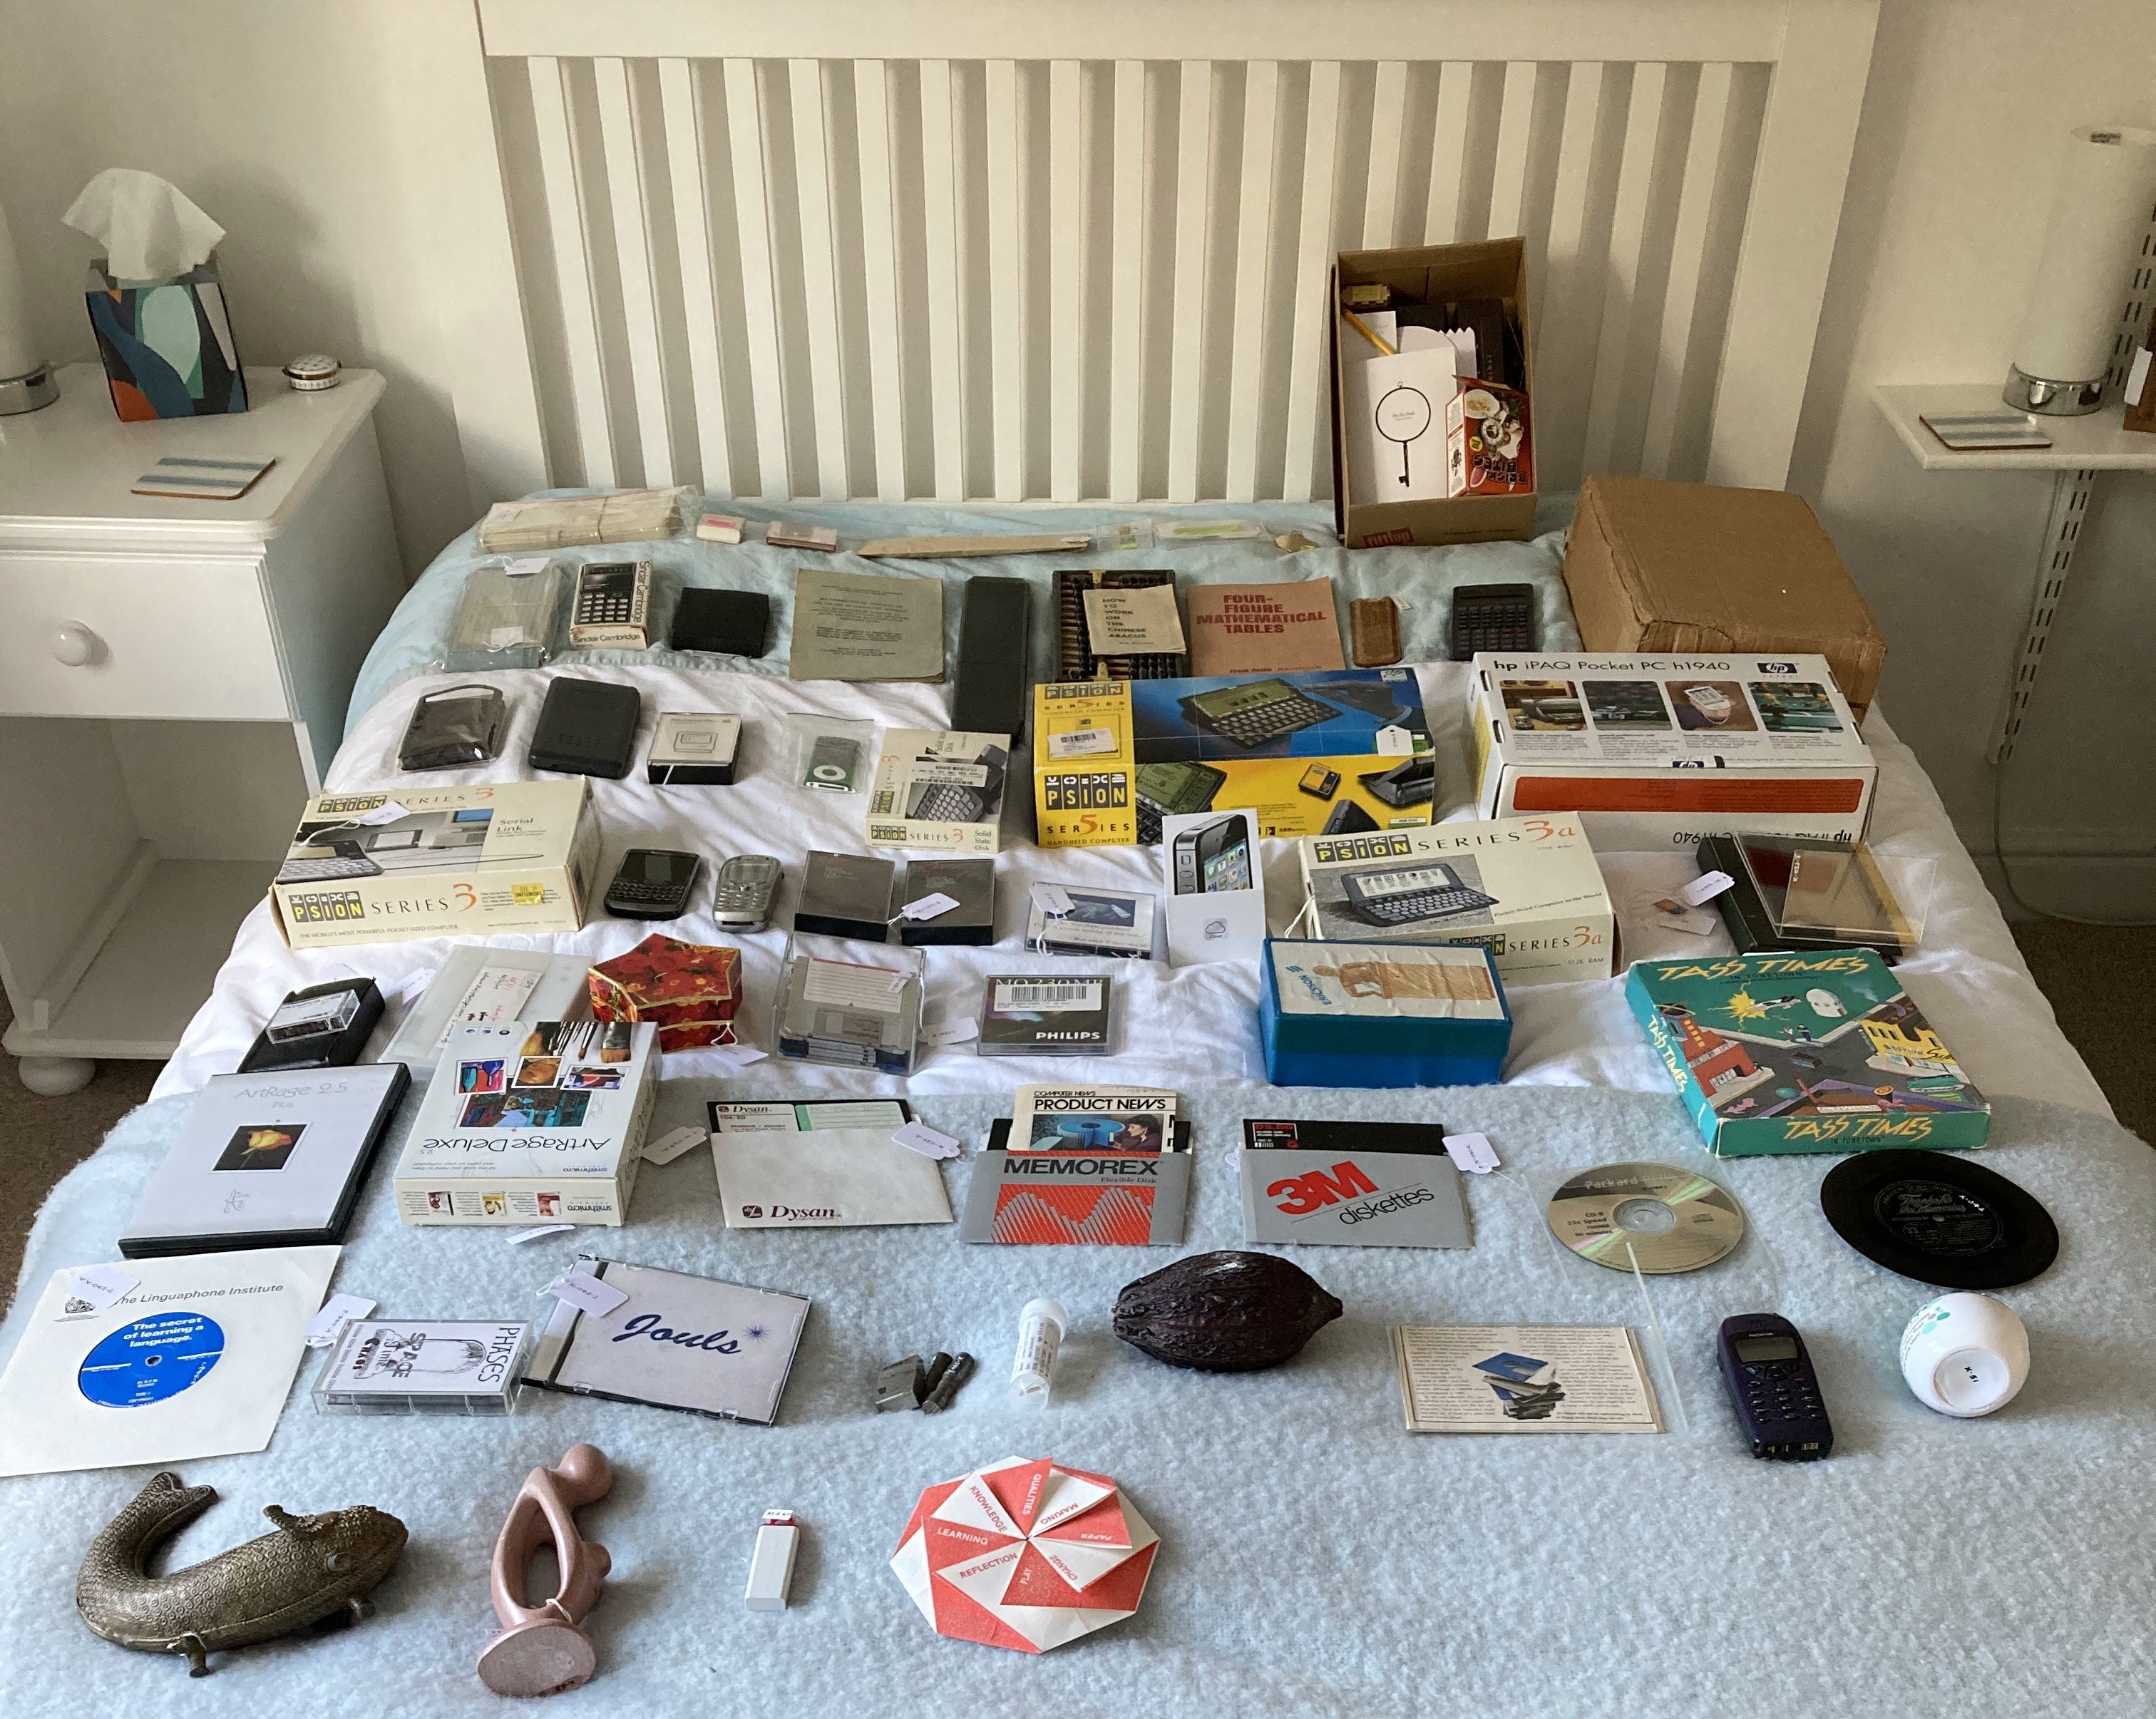
Of course, in a family household the items being stored may belong to different individuals. In our case about 58% of the items were owned by myself and my wife, about 36% by our children, and the remaining 6% by an elderly relative. Of course, we experienced the typical problem that parents have when their children move out – getting them to remove all their belongings. We still have some things that we believe are worth keeping but the individual is reluctant to take.

Designating Containers and general packaging considerations

The system I’ve been operating requires the objects being stored to be designated as either Items or Containers. Containers might be empty (like suitcases), or contain other Containers (such as a small suitcase in a large suitcase or a small box in a large box), or contain one or more Items. Items may be one individual thing (like a card table) or a collection of several things (such as 100s of music CDs). When I initiated the loft system, I tended to separate Containers from Items quite rigorously. For example, the box of old Rolling Stone and Boy’s Own magazines was indexed in two parts – C7 for the cardboard box they were in and Item 10 for the magazines. Now, some 20 years later I have removed the Container C7 from the index and relabelled the combined box and magazines as Item 10: the reasons being that a) the box is only ever going to be used to house the magazines, b) looking up the reference on the Container label just tells you what the container is, but having a combined item number on the label on the box enables you to find out what is being stored, and c) managing two index entries when just one will do is just extra unnecessary work.

I recount these details as I’ve realised that deciding whether to combine container and item or to keep them separate is important because it can help to minimise effort and maximise usefulness. The rule of thumb I now apply is that if the contents are to be indexed as a single Item, and if they are likely to stay in the loft for several years, then I combine the Container and the Item, and index and label it as a single Item. An addendum to this is that if one Item consists of several objects of the same type it is probably more effective to store it on its own: that way it will be easier to manage and to find.

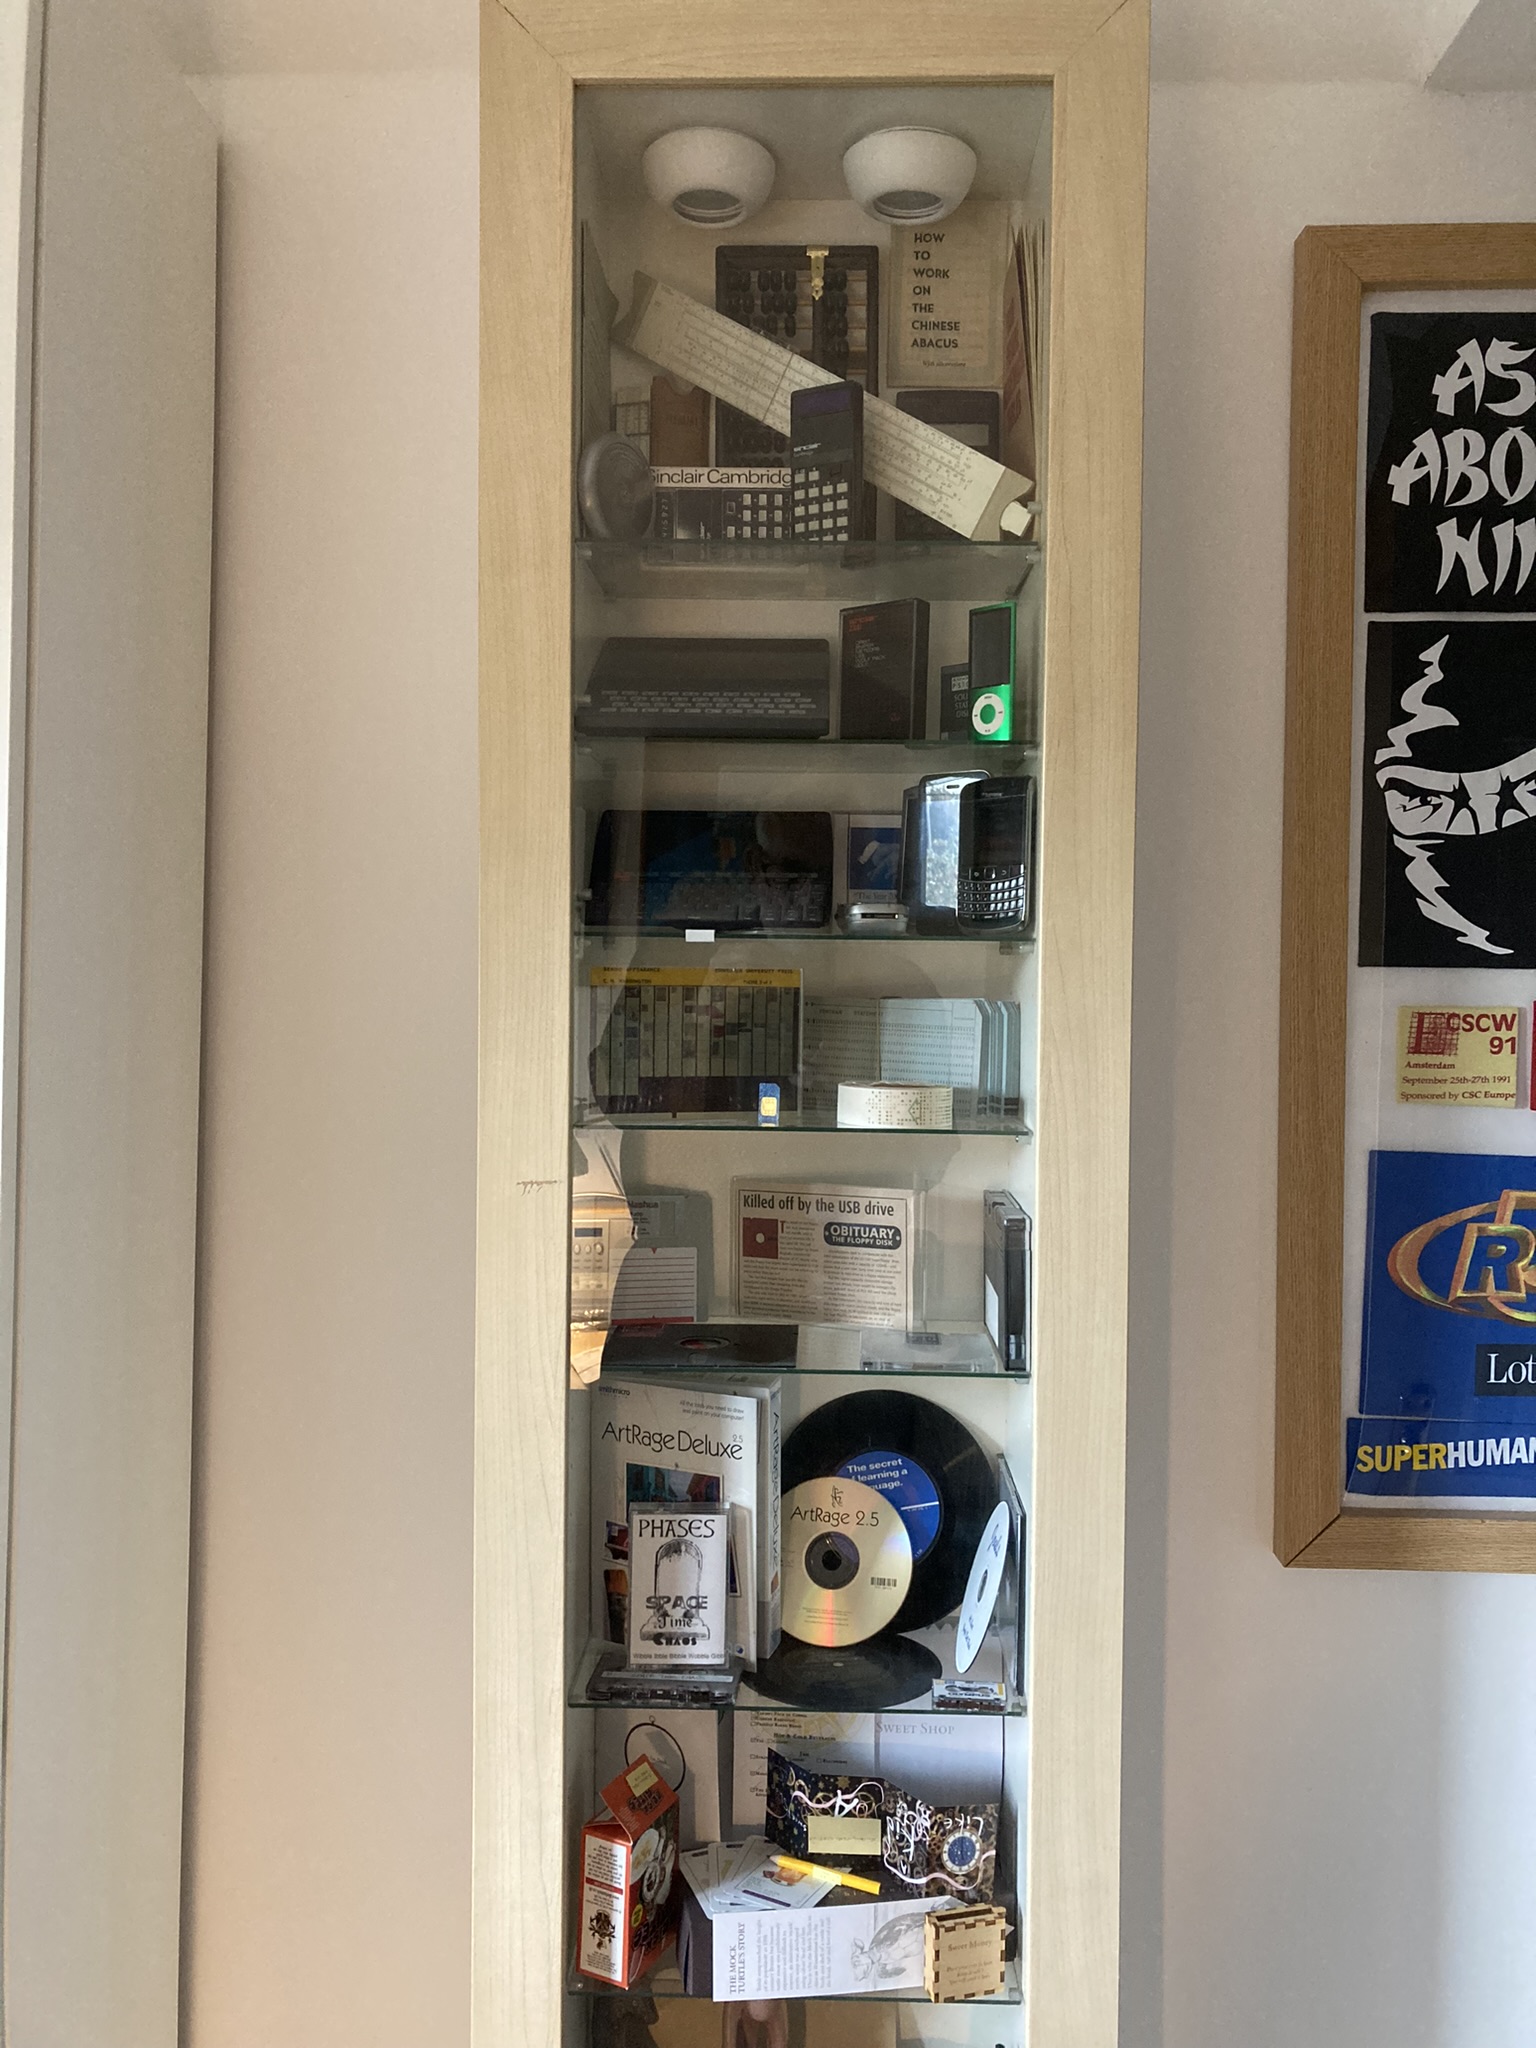
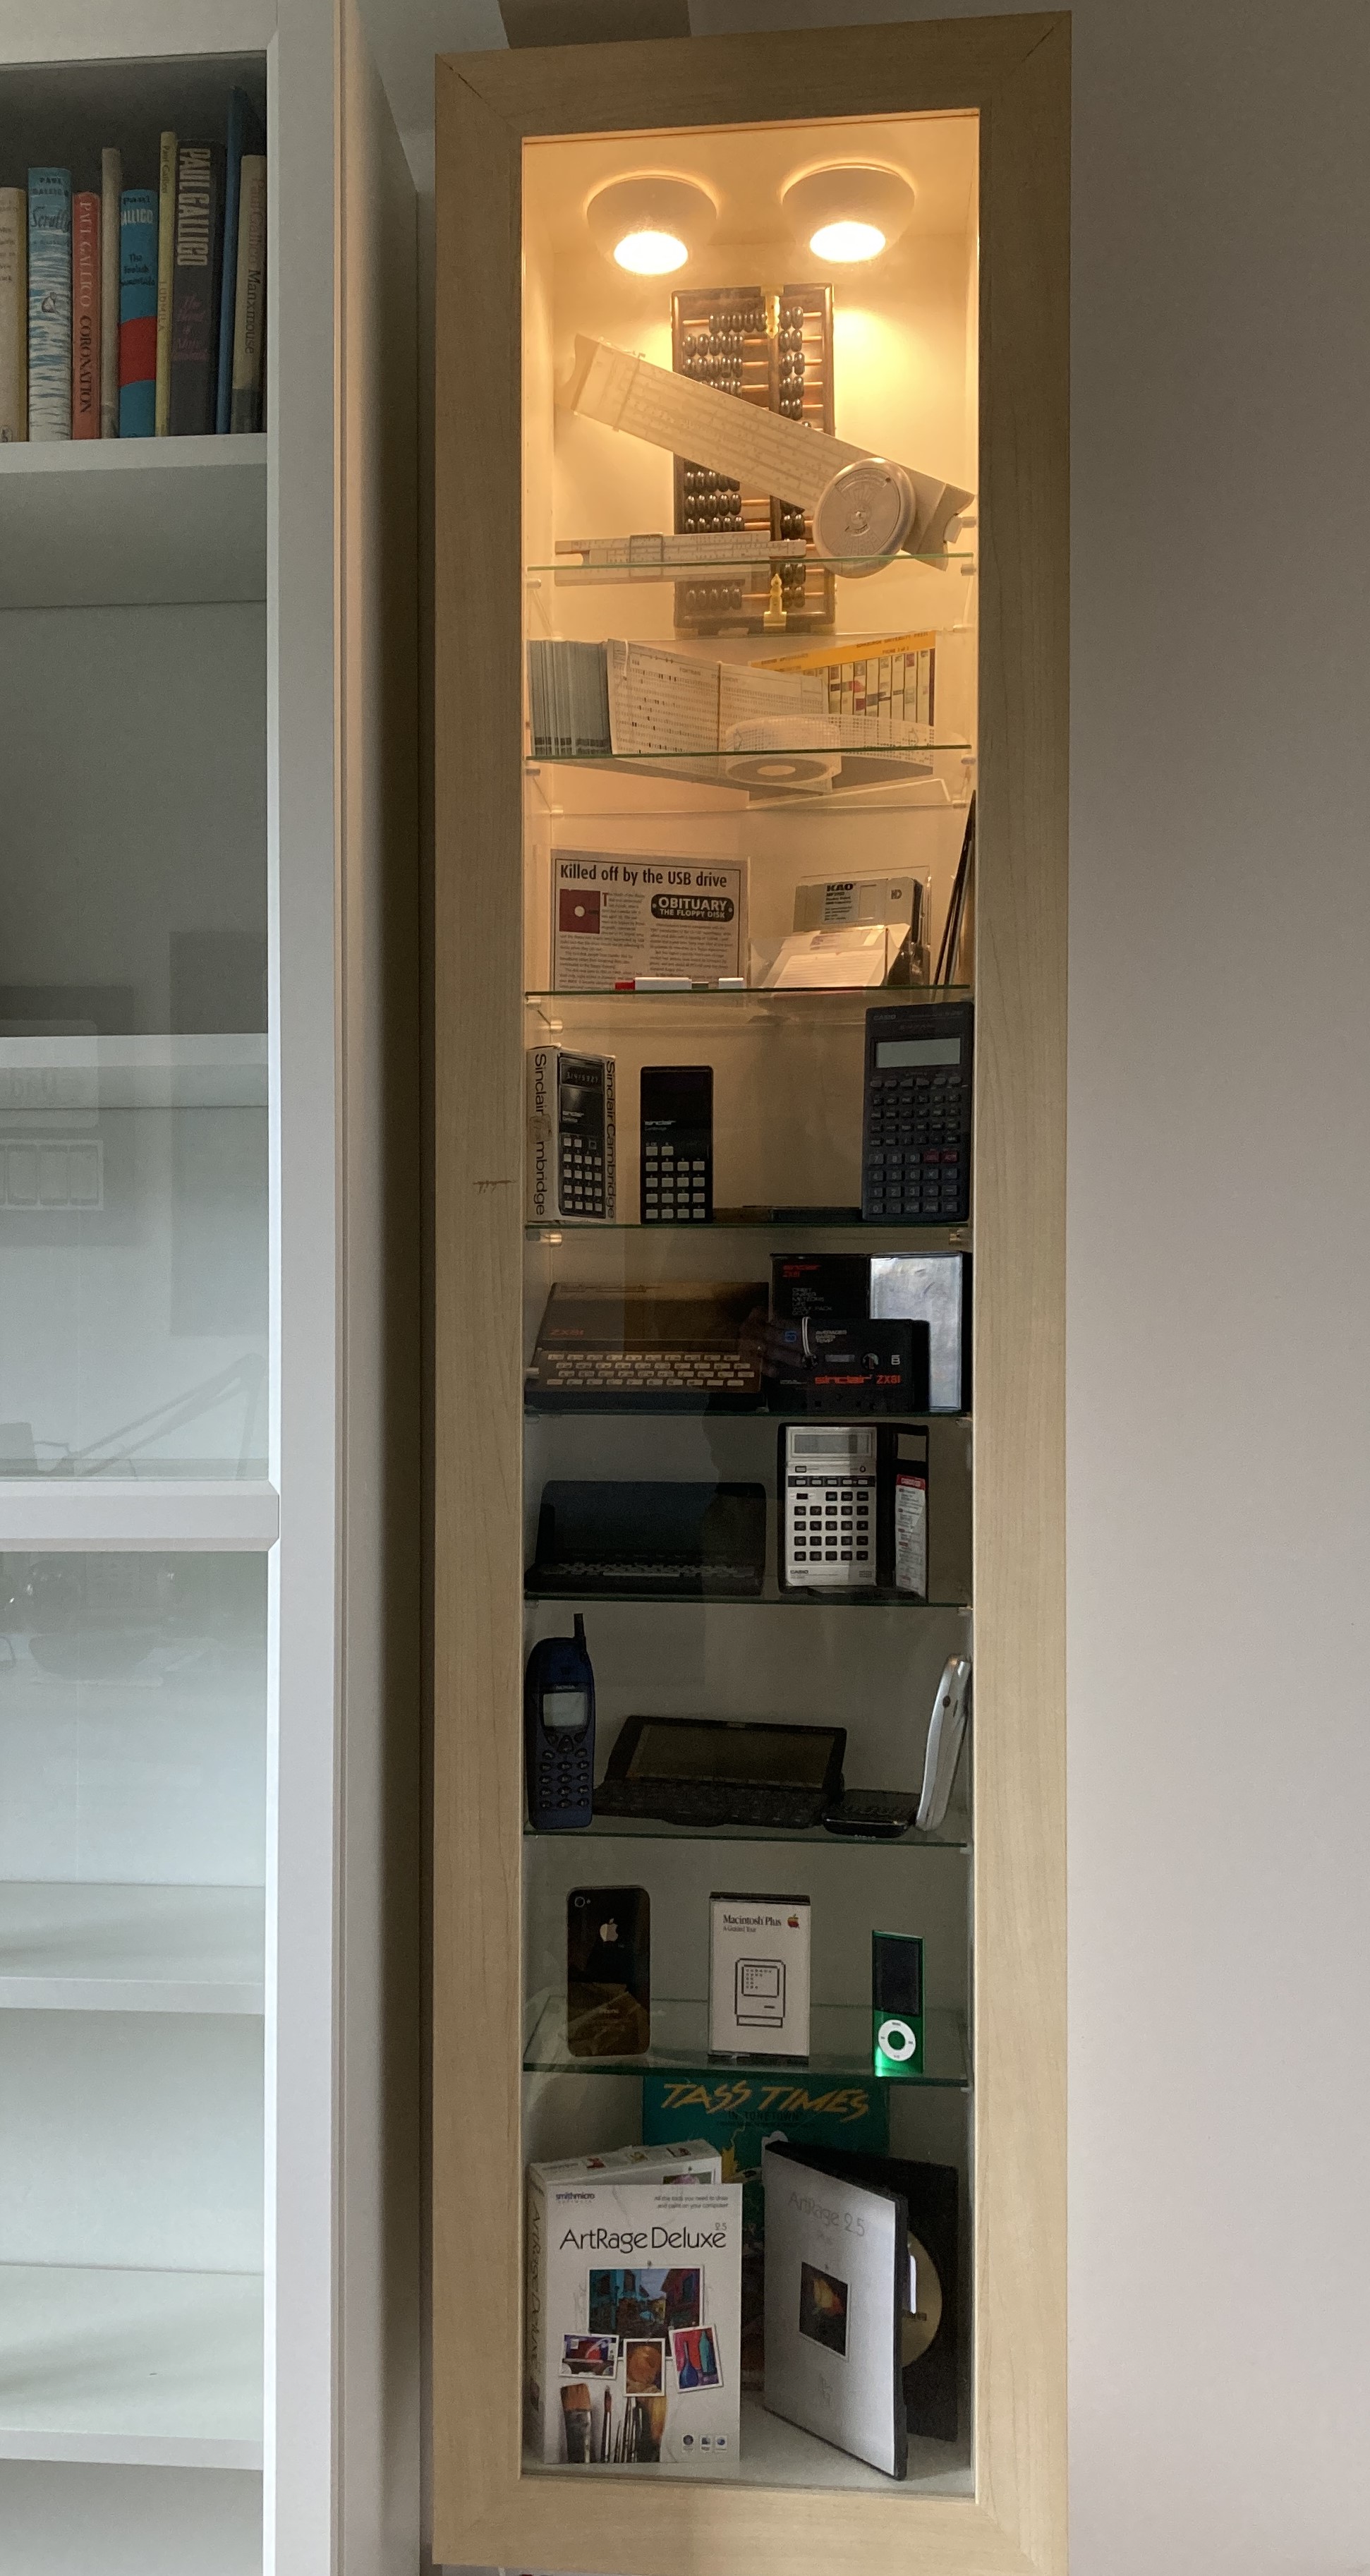
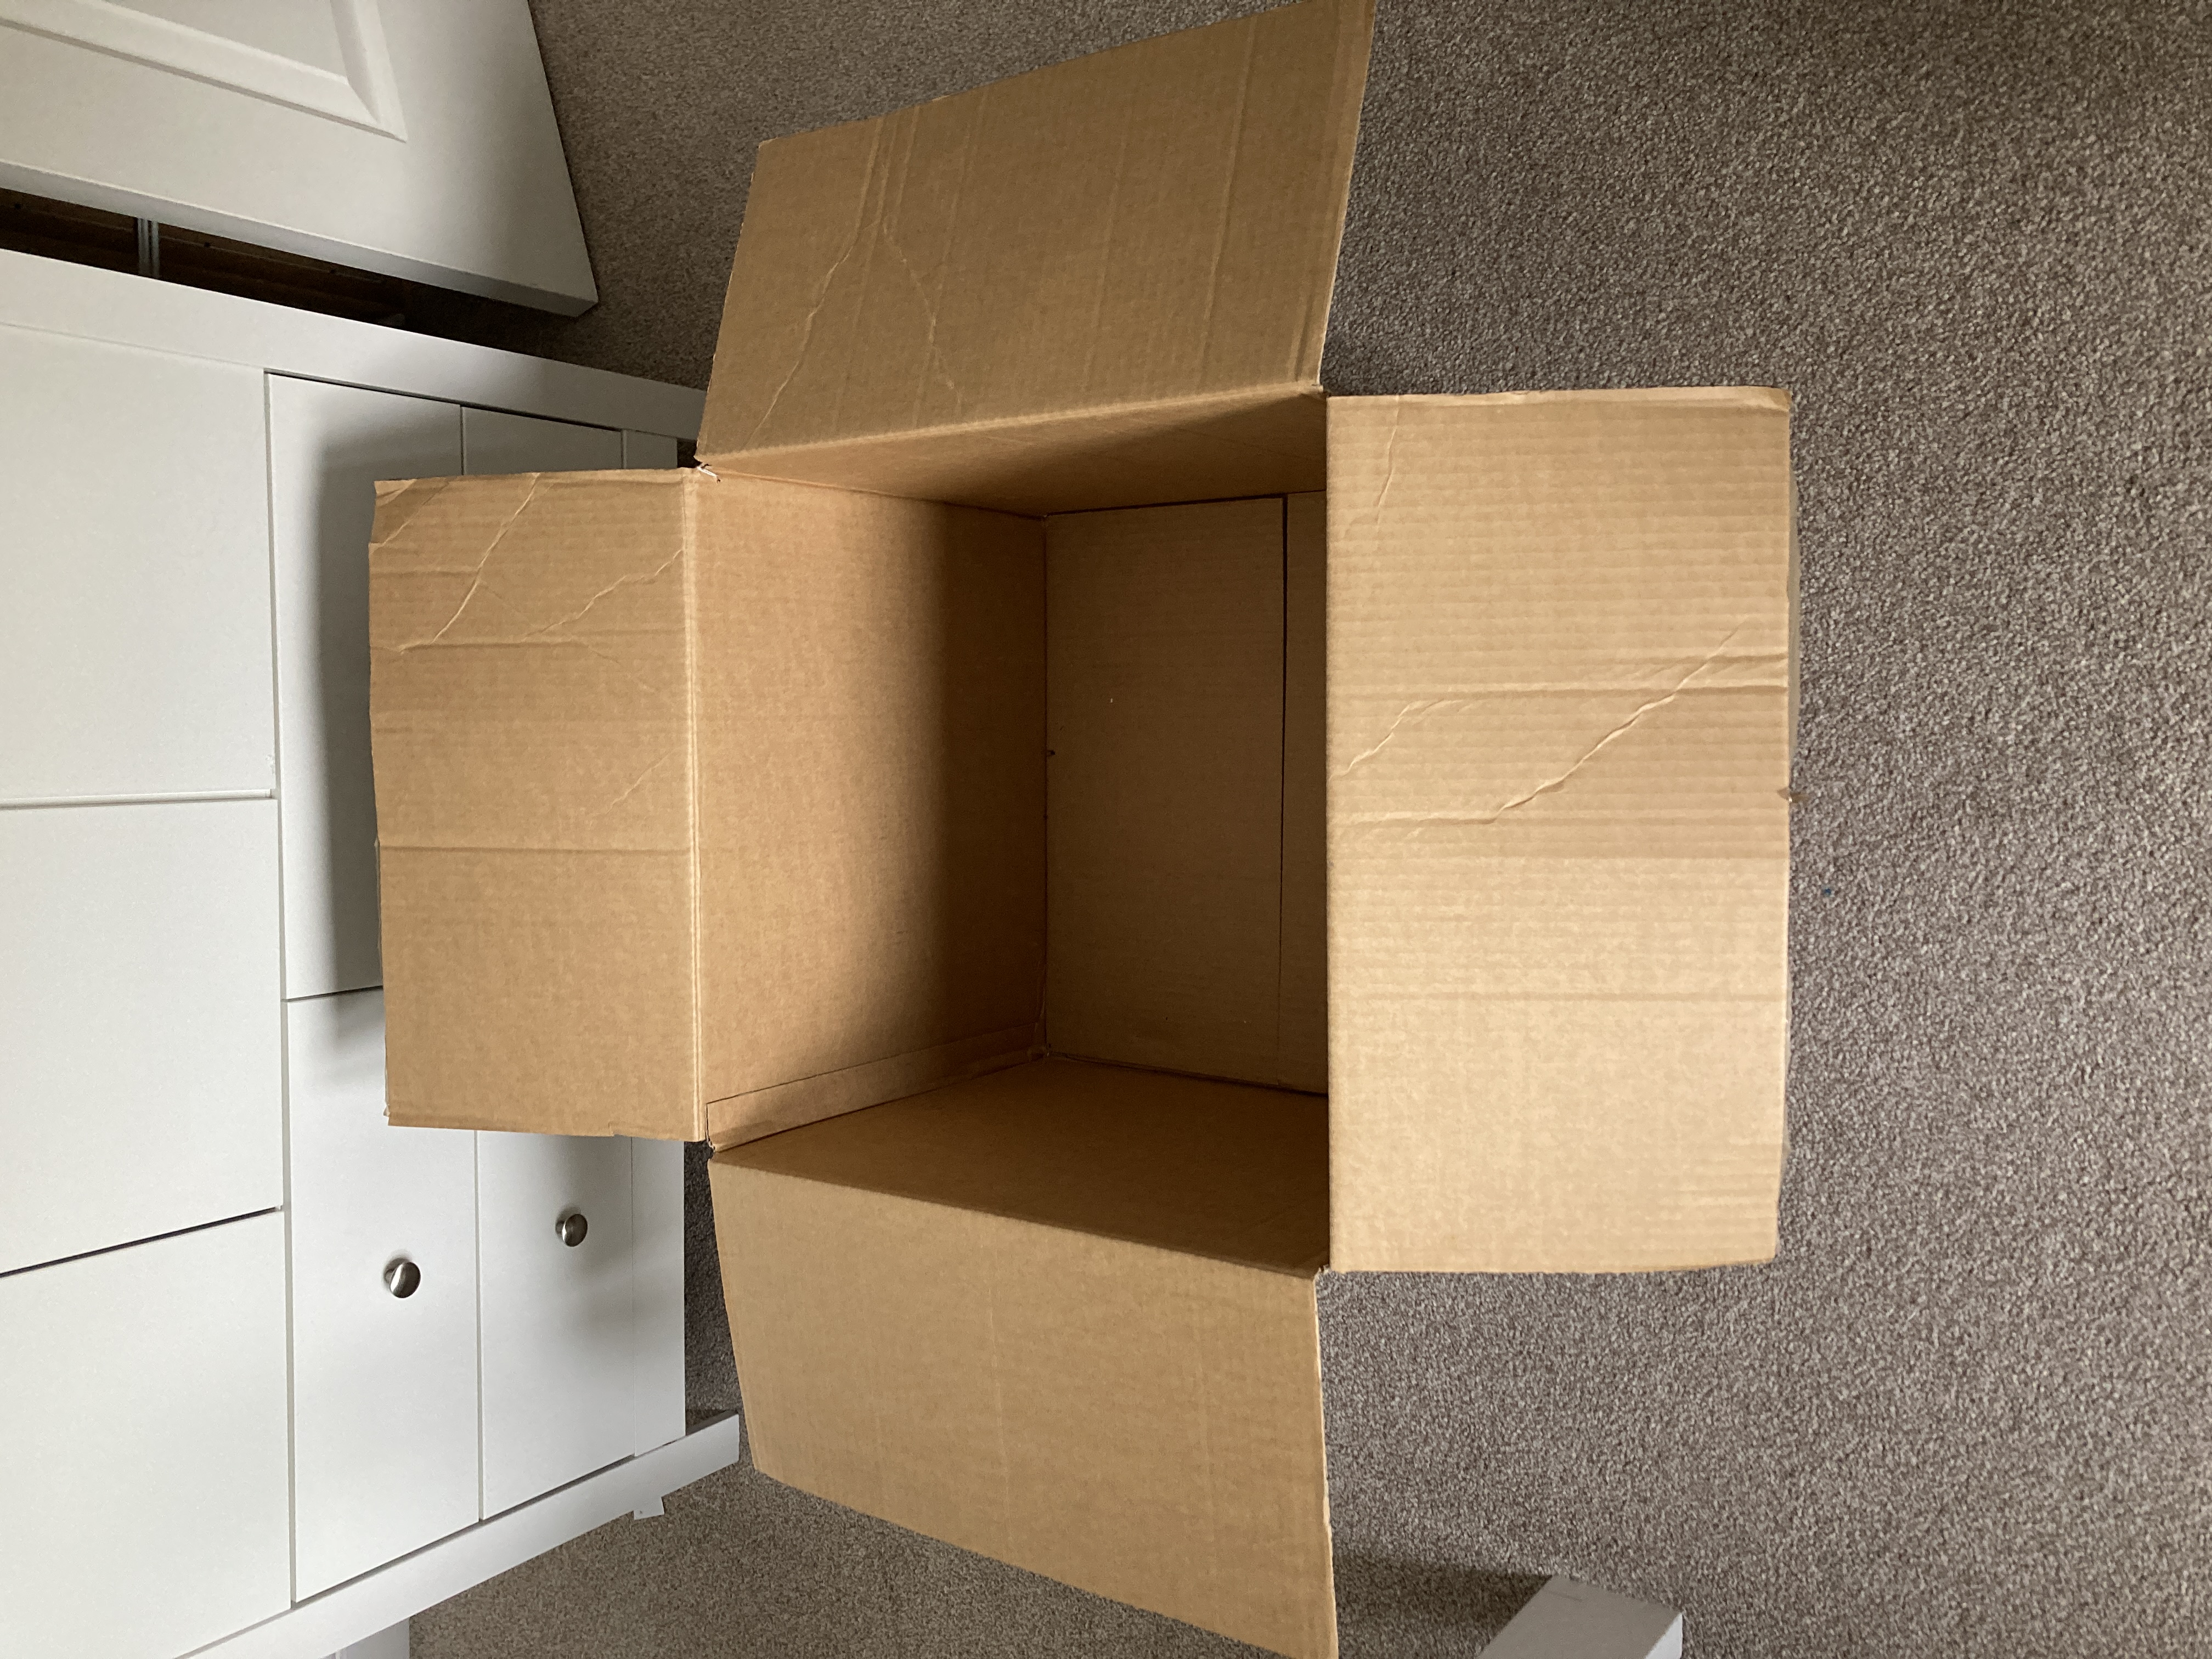
Regardless of the above deliberations, I always try to enclose Items in some sort of packaging to avoid them getting dusty and/or eaten by rodents. Over the years I have used suitcases, cardboard boxes, tubes, shoe boxes, plastic bags, long transparent solid plastic containers, and long bags that carpet comes in. Some of these have been indexed as Containers and some have just been made an integral part of the item. The Items I have stored without any covering are usually pieces of furniture (like a coffee table, wallpaper table, or kitchen chairs).  Generally speaking, I’ve found it best to store Items with minimum folding or rolling because over the long term those characteristics temd to become embedded in the objects concerned. I have facsimiles of two old copies of The Times rolled up in a tube, which have to be held or weighted down to stop them from rolling up again when they are being read. I’ve also stored large sheets of bookbinding cardboard upright in a cardboard box leaning against a rafter, but over time the box and the boards bent. All of these items would have benefitted from being stored flat.

Managing the organisation of the physical objects in the loft

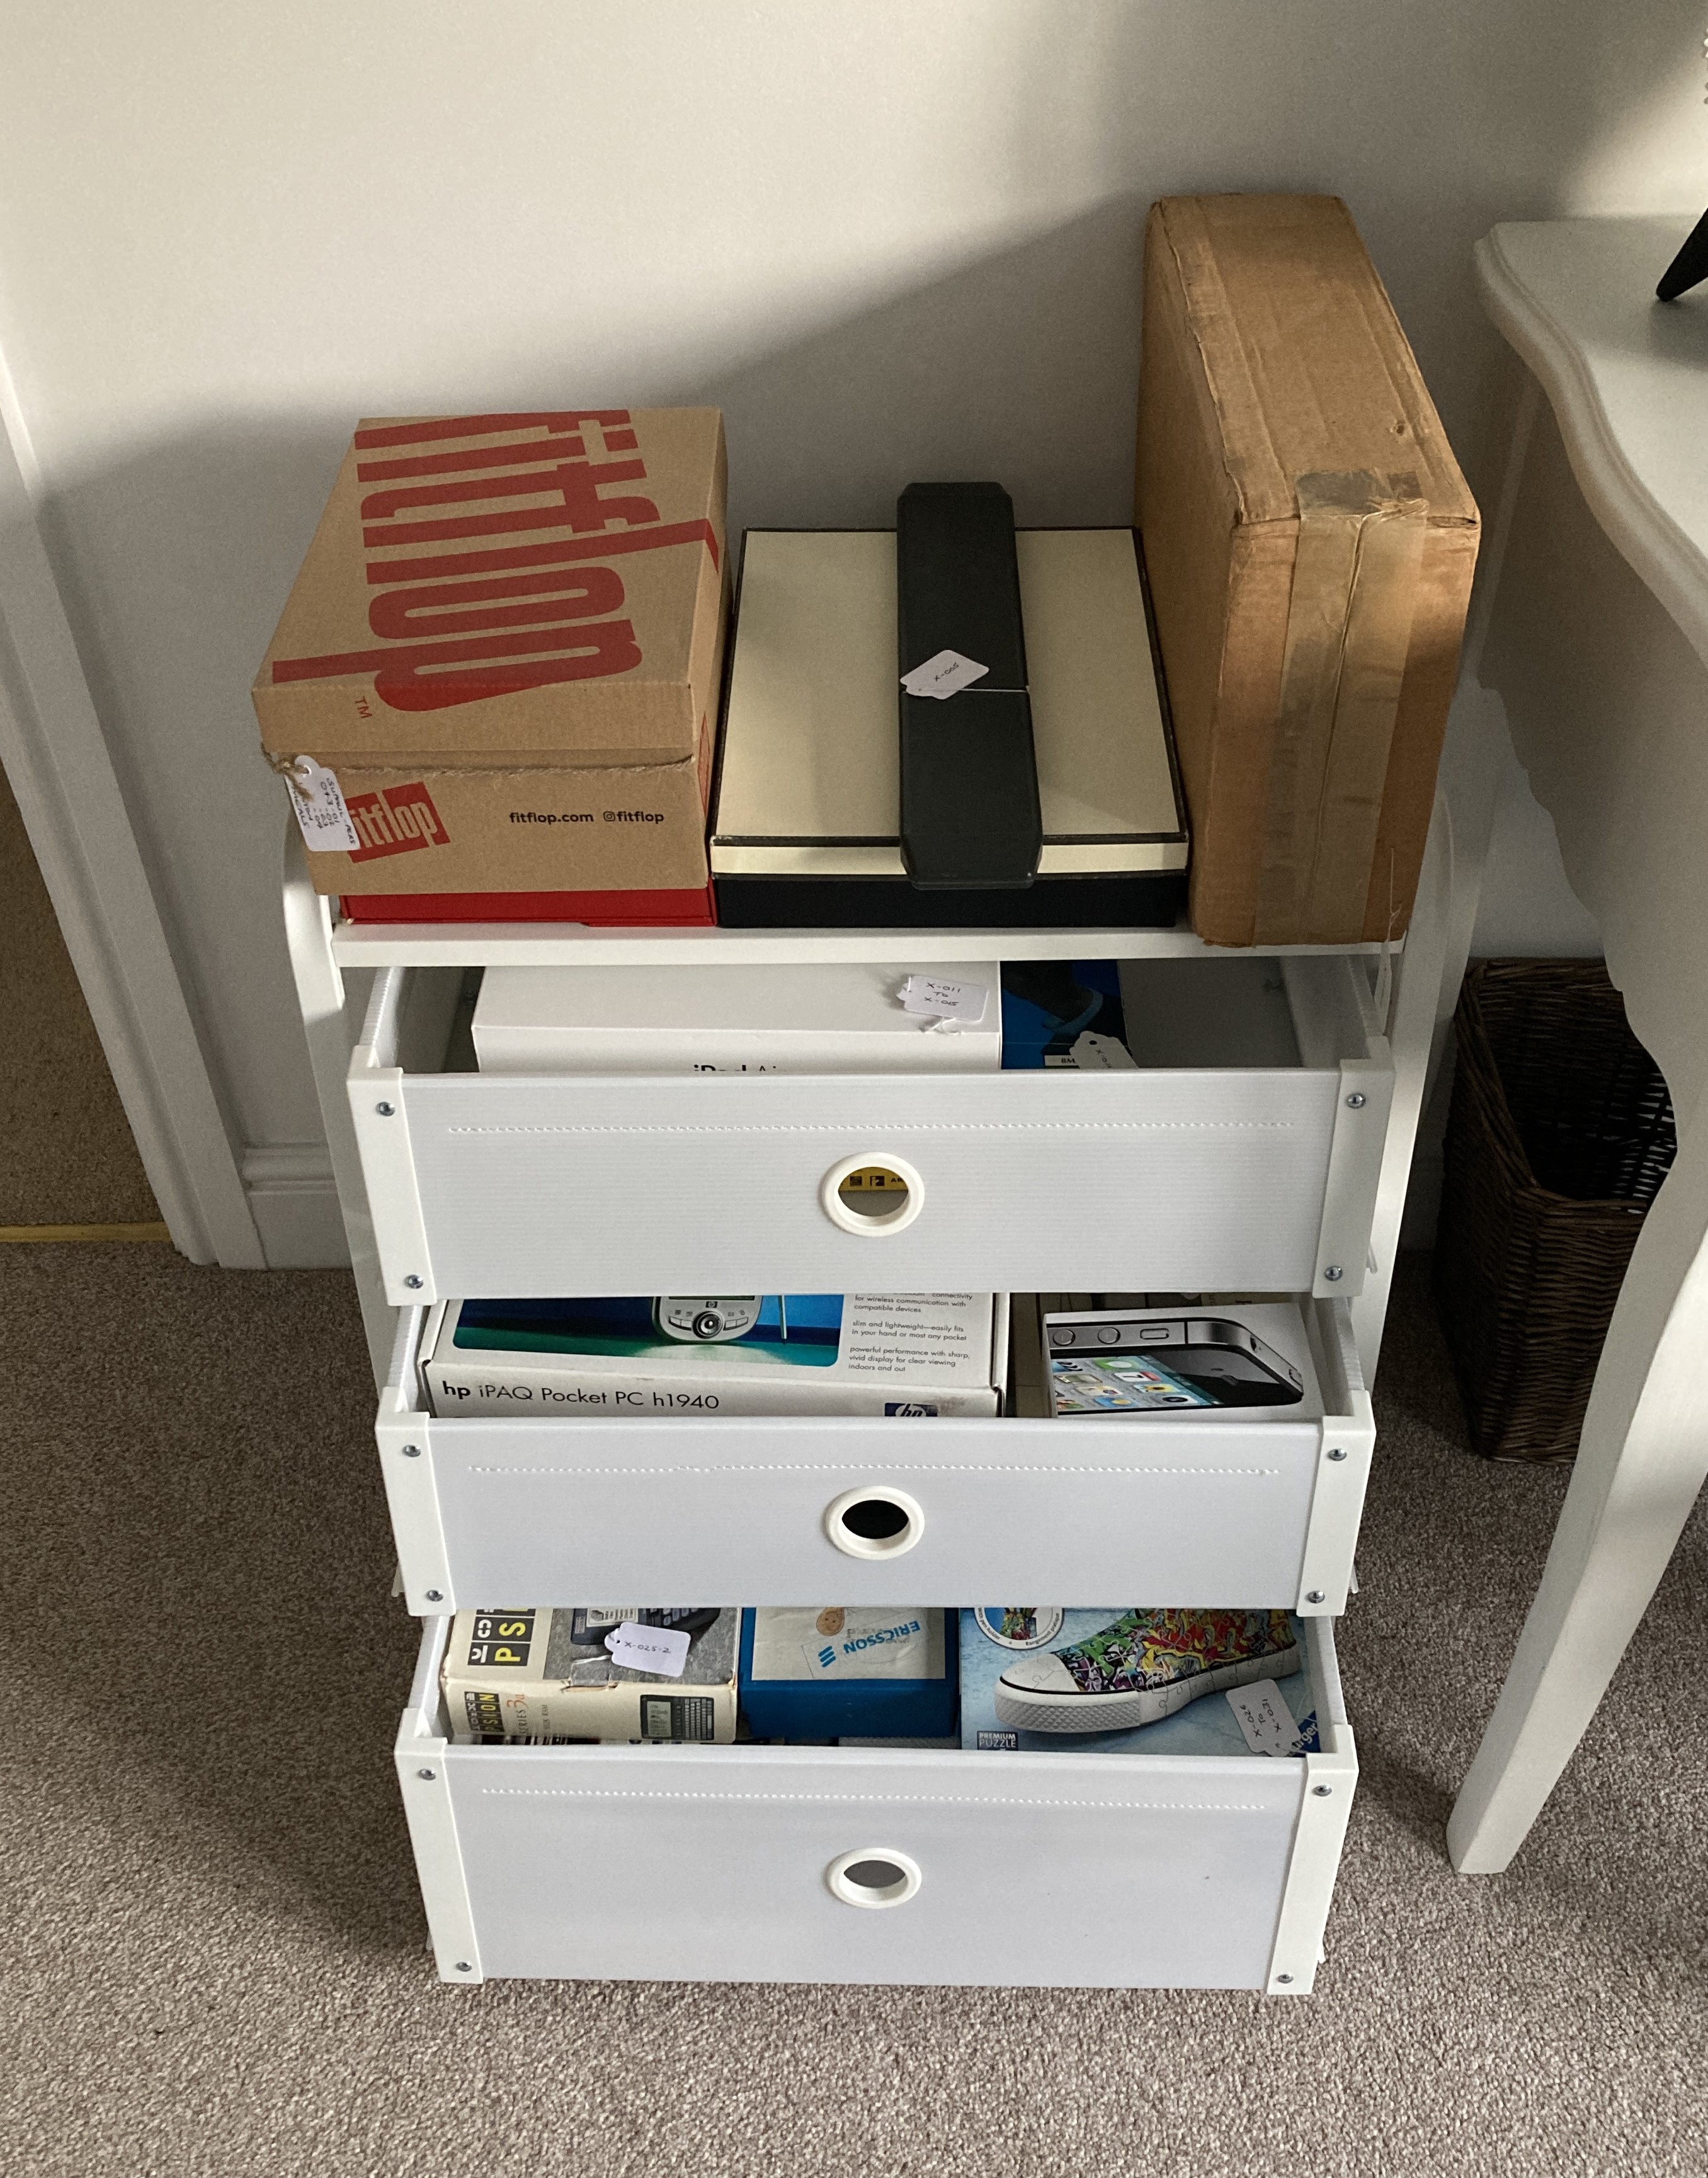
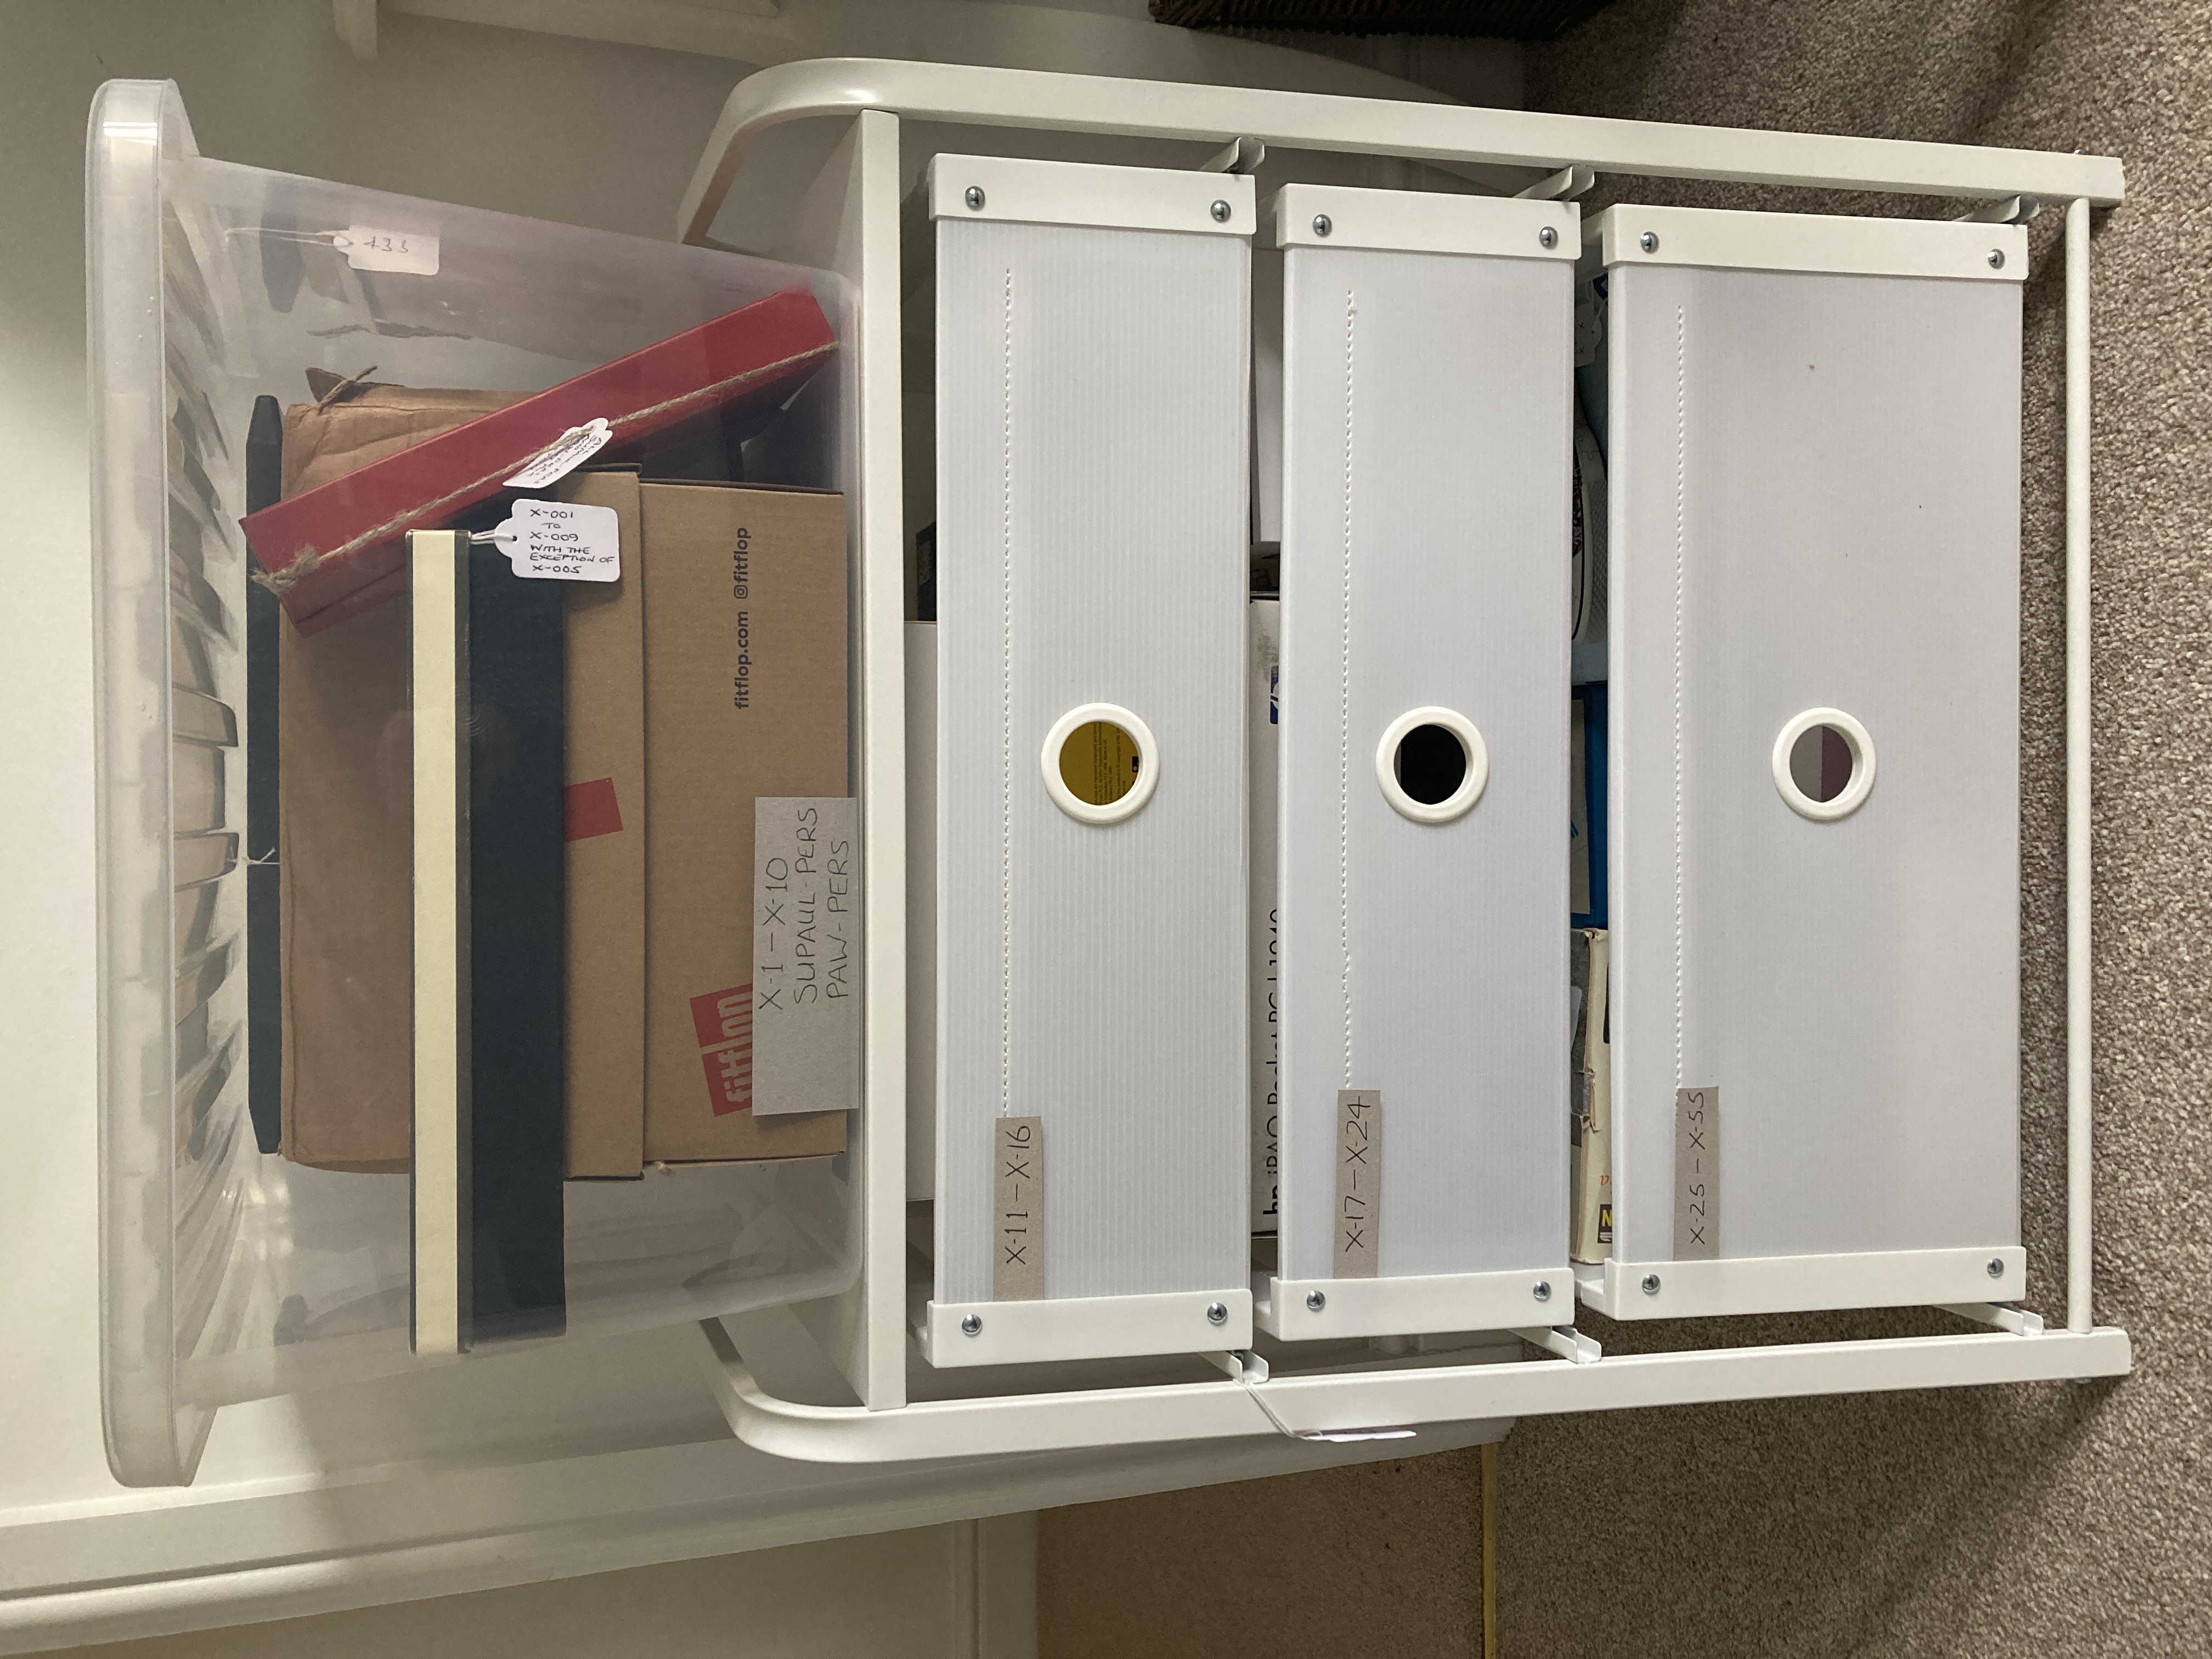
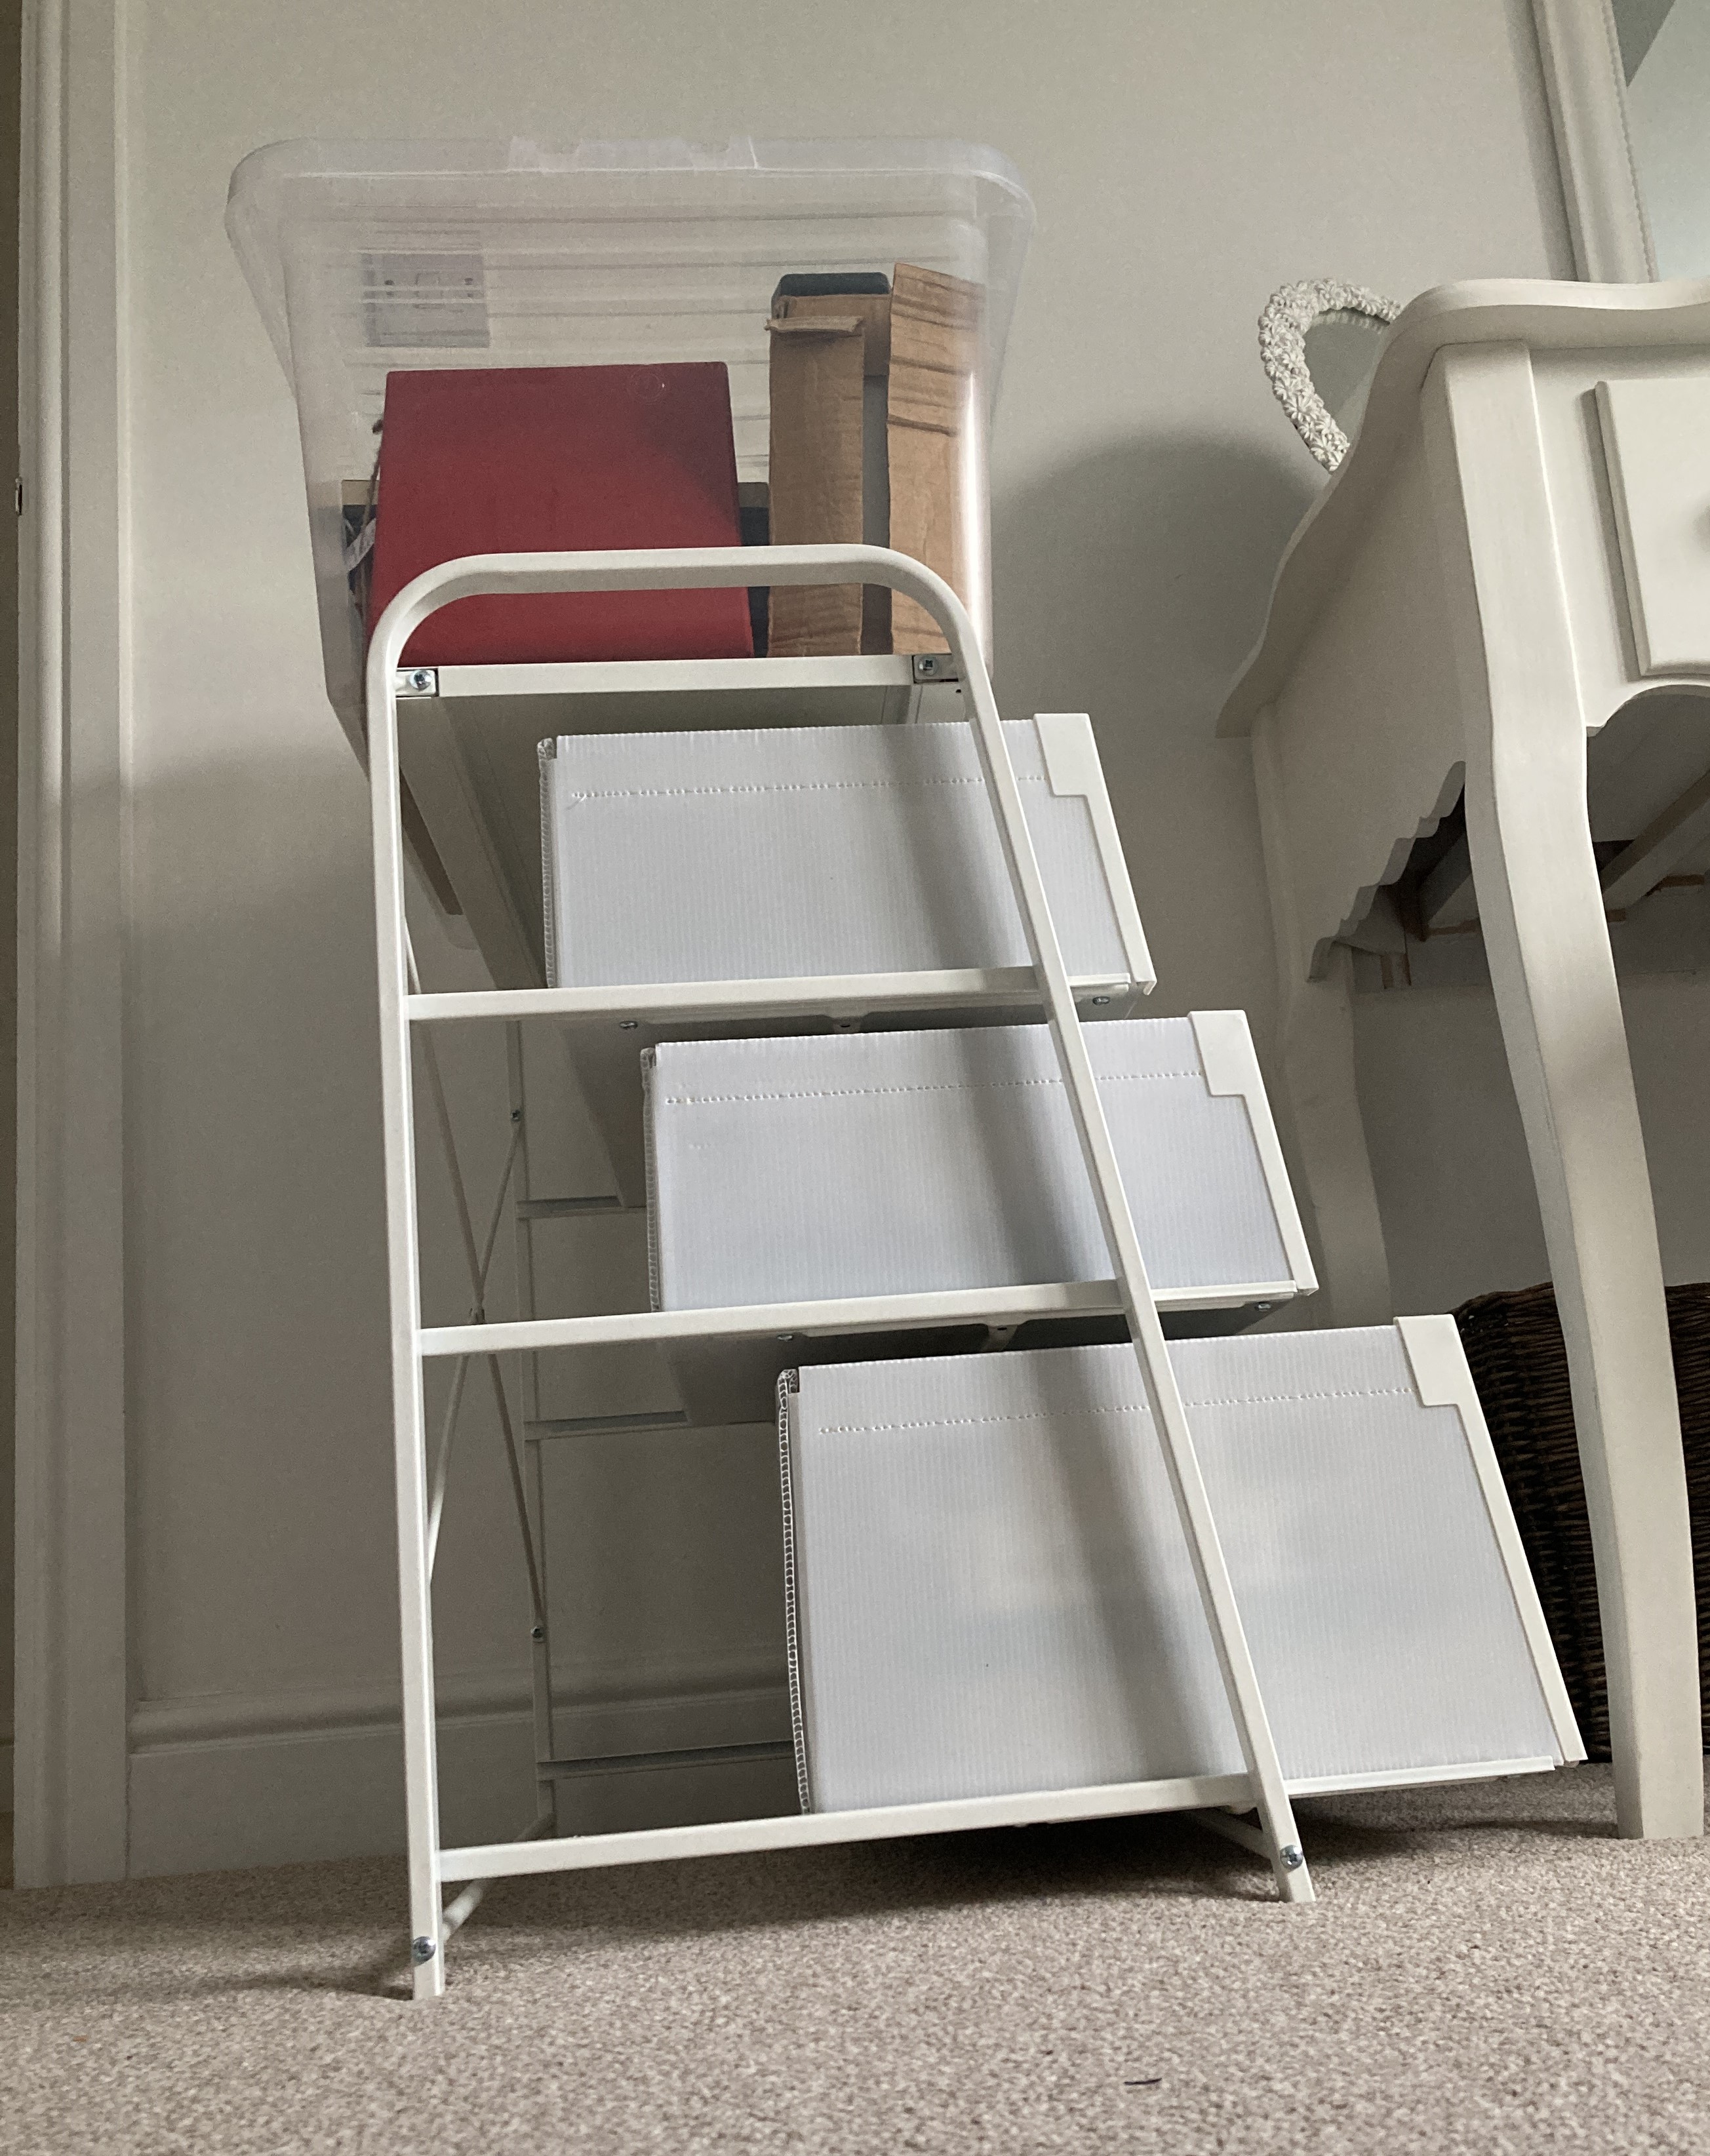
It is important to clearly label the Positions where the Containers and Items are to be placed. The Positions should be clearly differentiated from each other so there is no ambiguity (I use the loft rafters as the delineator) since it is the Position numbers that enable the Items to be found. Containers and Items should not be placed across two or more Positions except in special circumstances (for example, I have a large number of spare empty boxes which are indexed as a single item but which fill 3 separate positions).

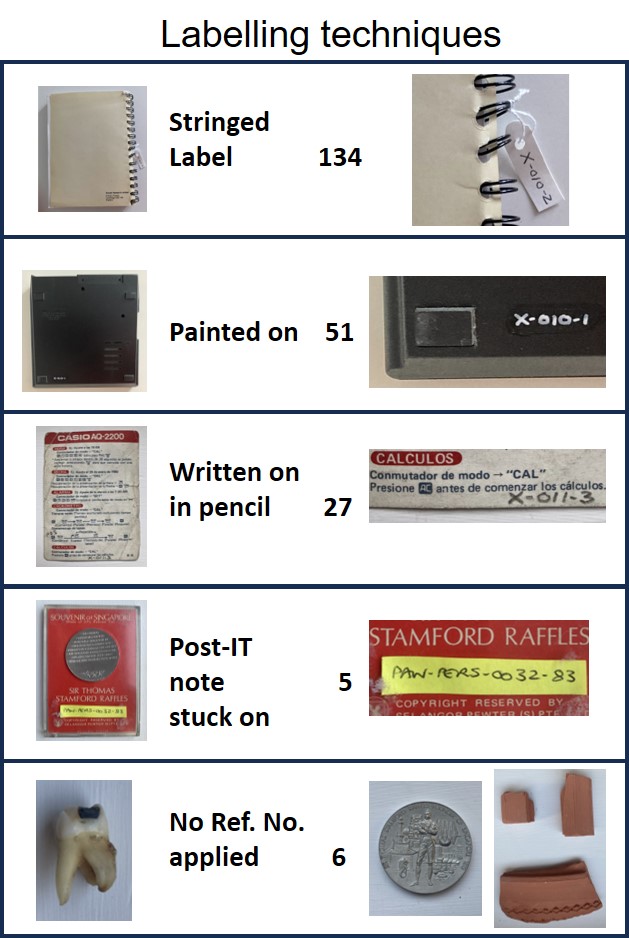
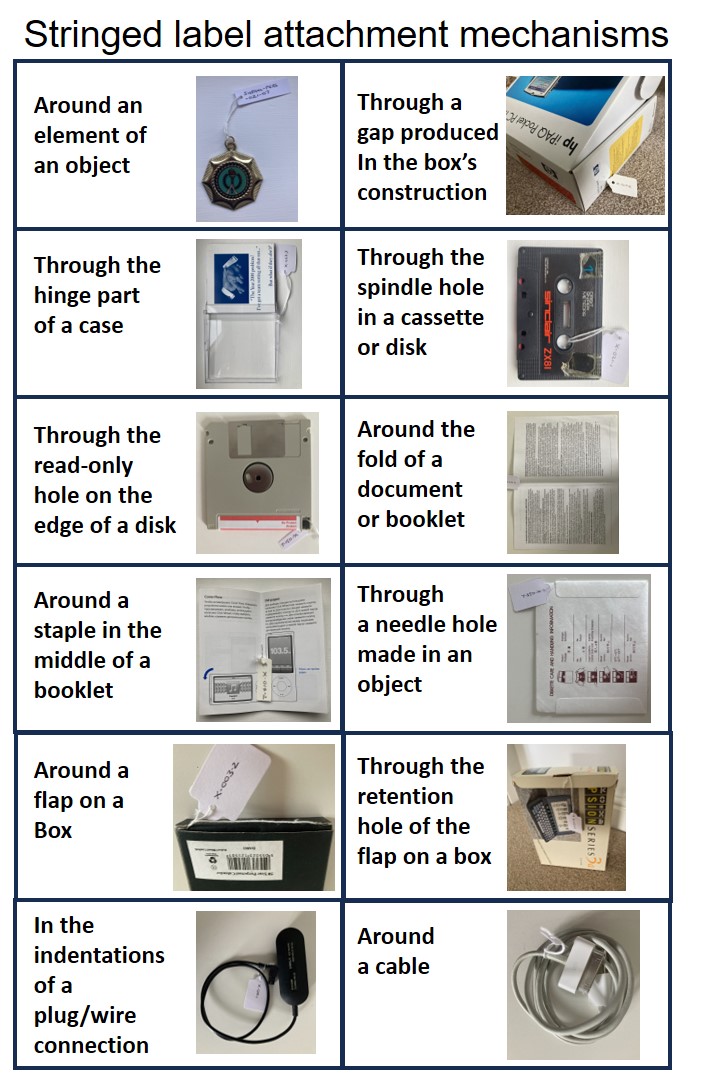
I write Container and Item labels on both sides, and I place them so that their labels are showing and closest to the front of the position. To facilitate this, I take care not to stack too many Items or Containers on top of one another or behind each other. This also helps to minimise the number of Items/Containers that have to be moved to access the one you want. If an Item consists of more than one object I package them together with a single label; however, if the objects are not packaged together, I give each one the same label with the same information. Of course, it is important to label an Item or Container with the correct label as specified in the Index.

I have found that, over time, Items consisting of large numbers of the same things (particularly packaging Items such as a box of small boxes, or a collection of boxes) may get very disorganised and need sorting out. In doing so I take the opportunity to discard unwanted items, and to organise the objects in such a way that they are easy to see and access.

Managing the Index

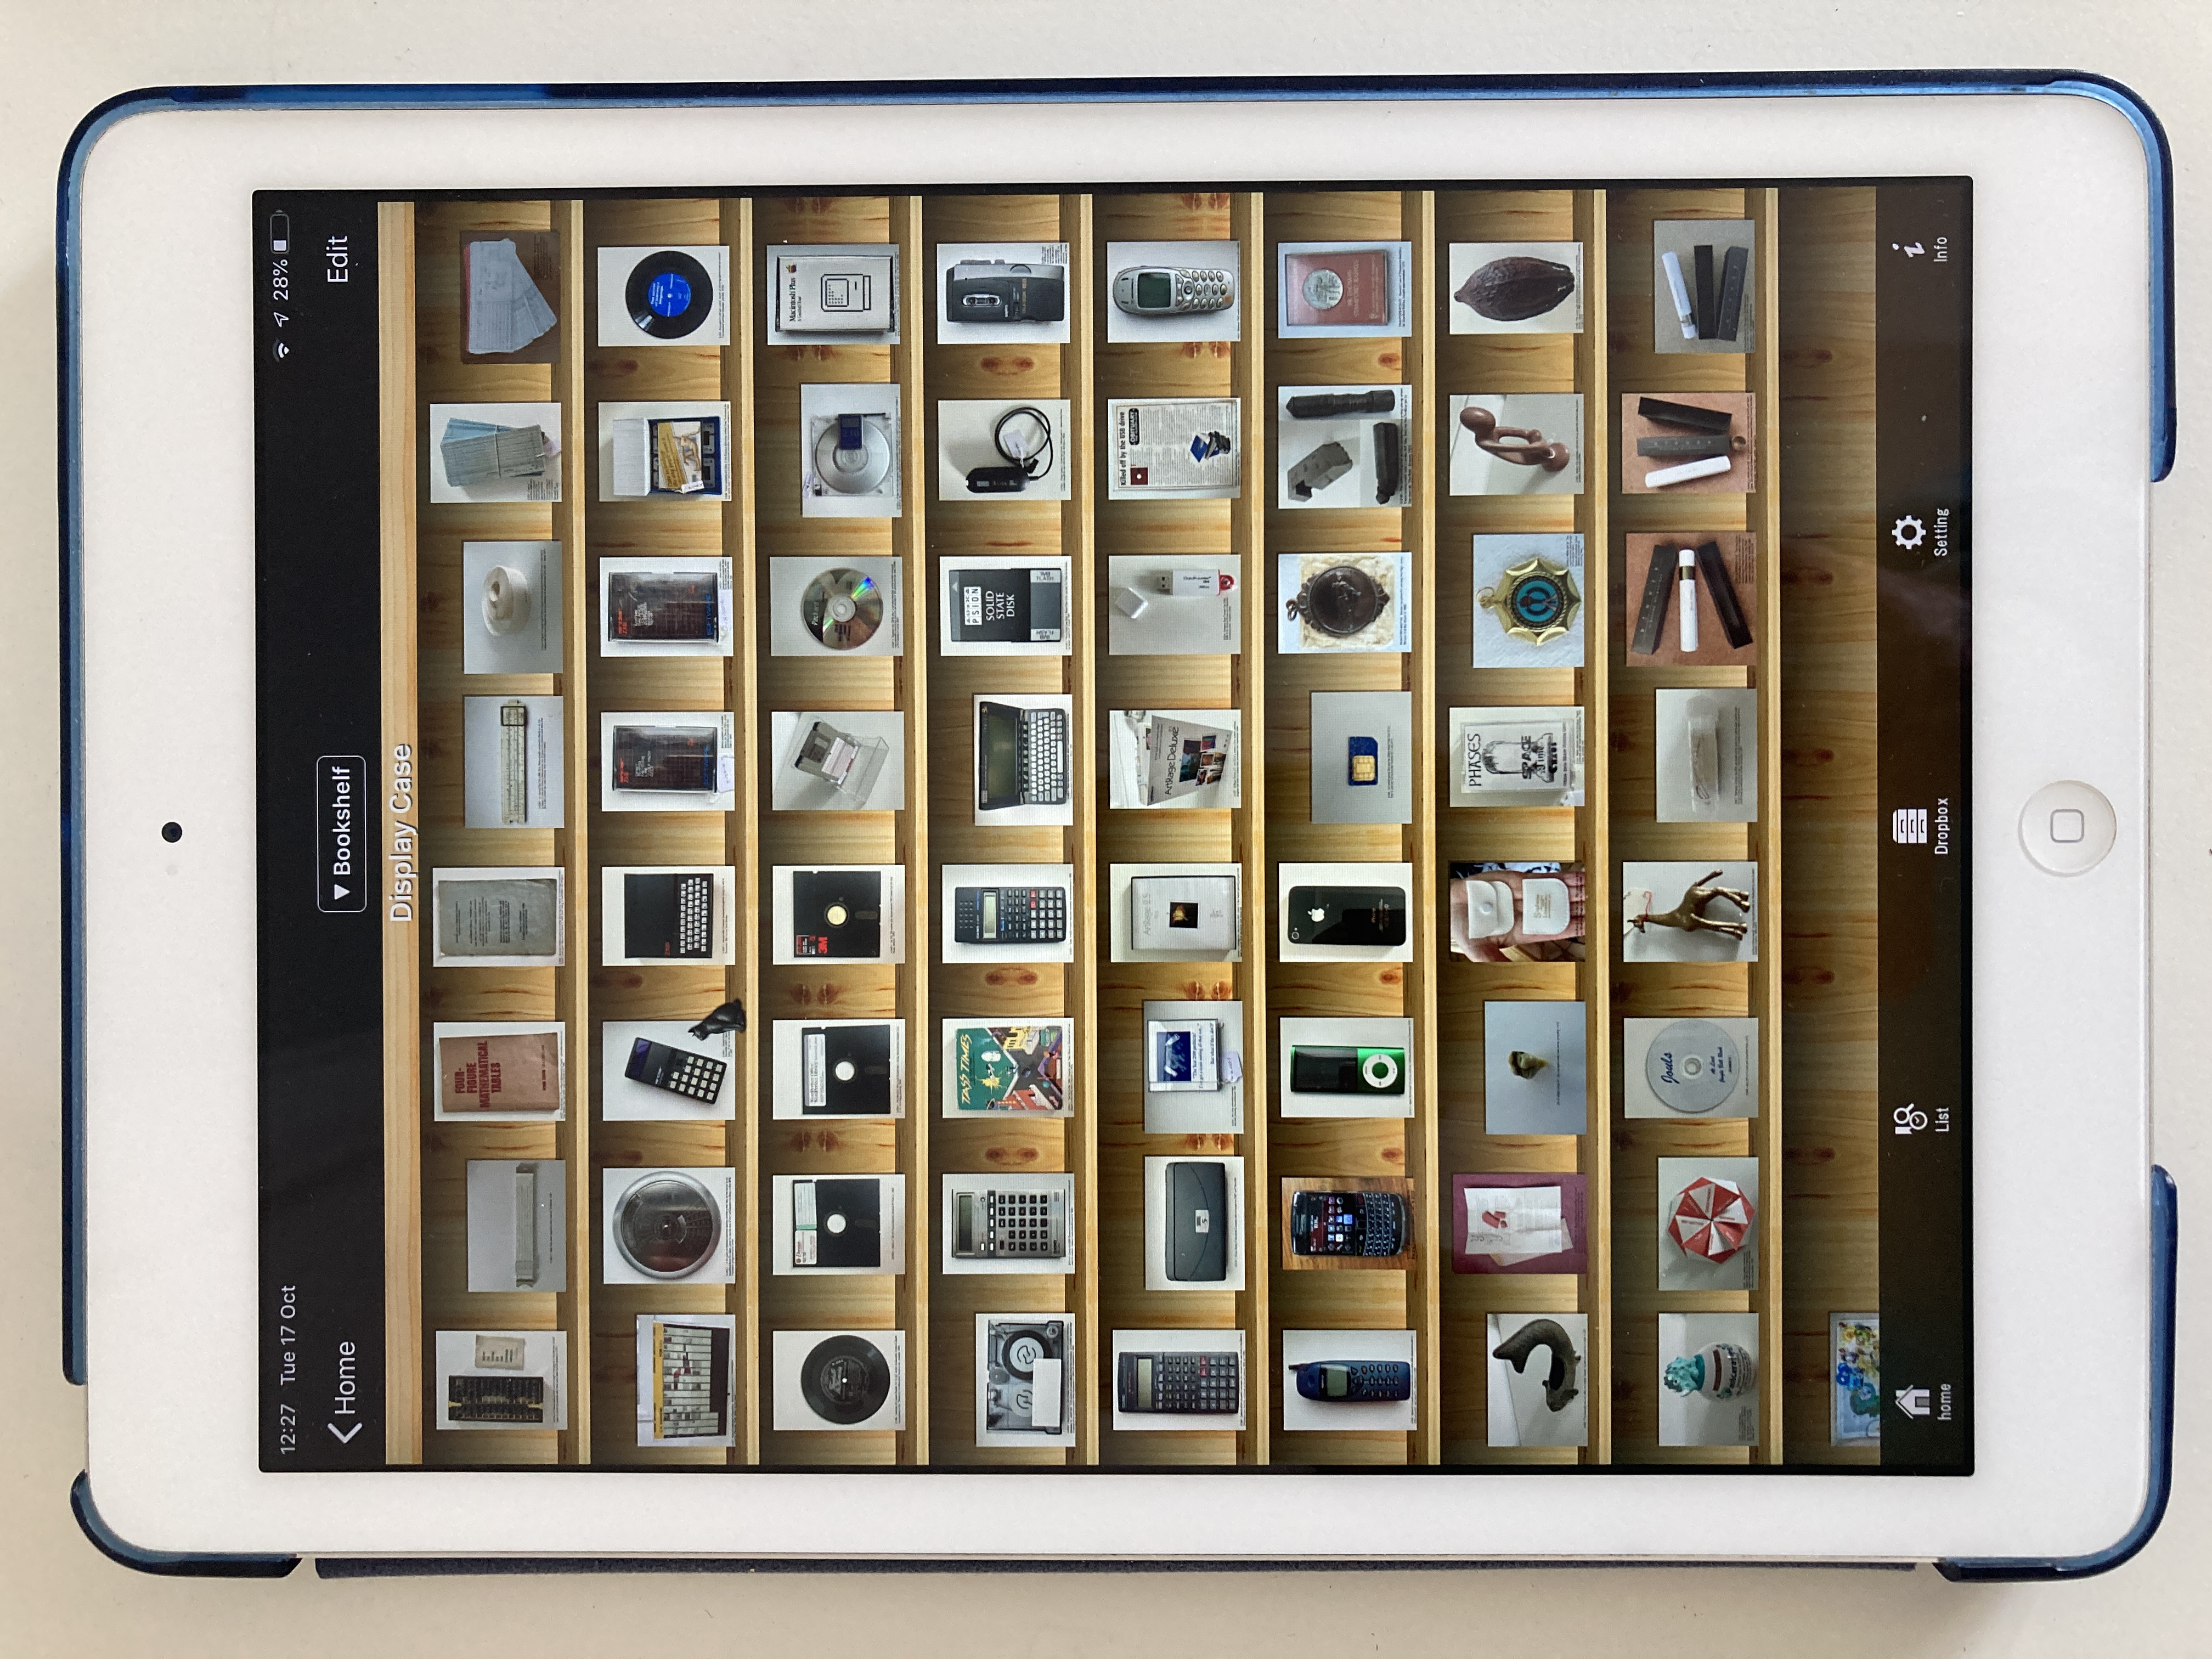
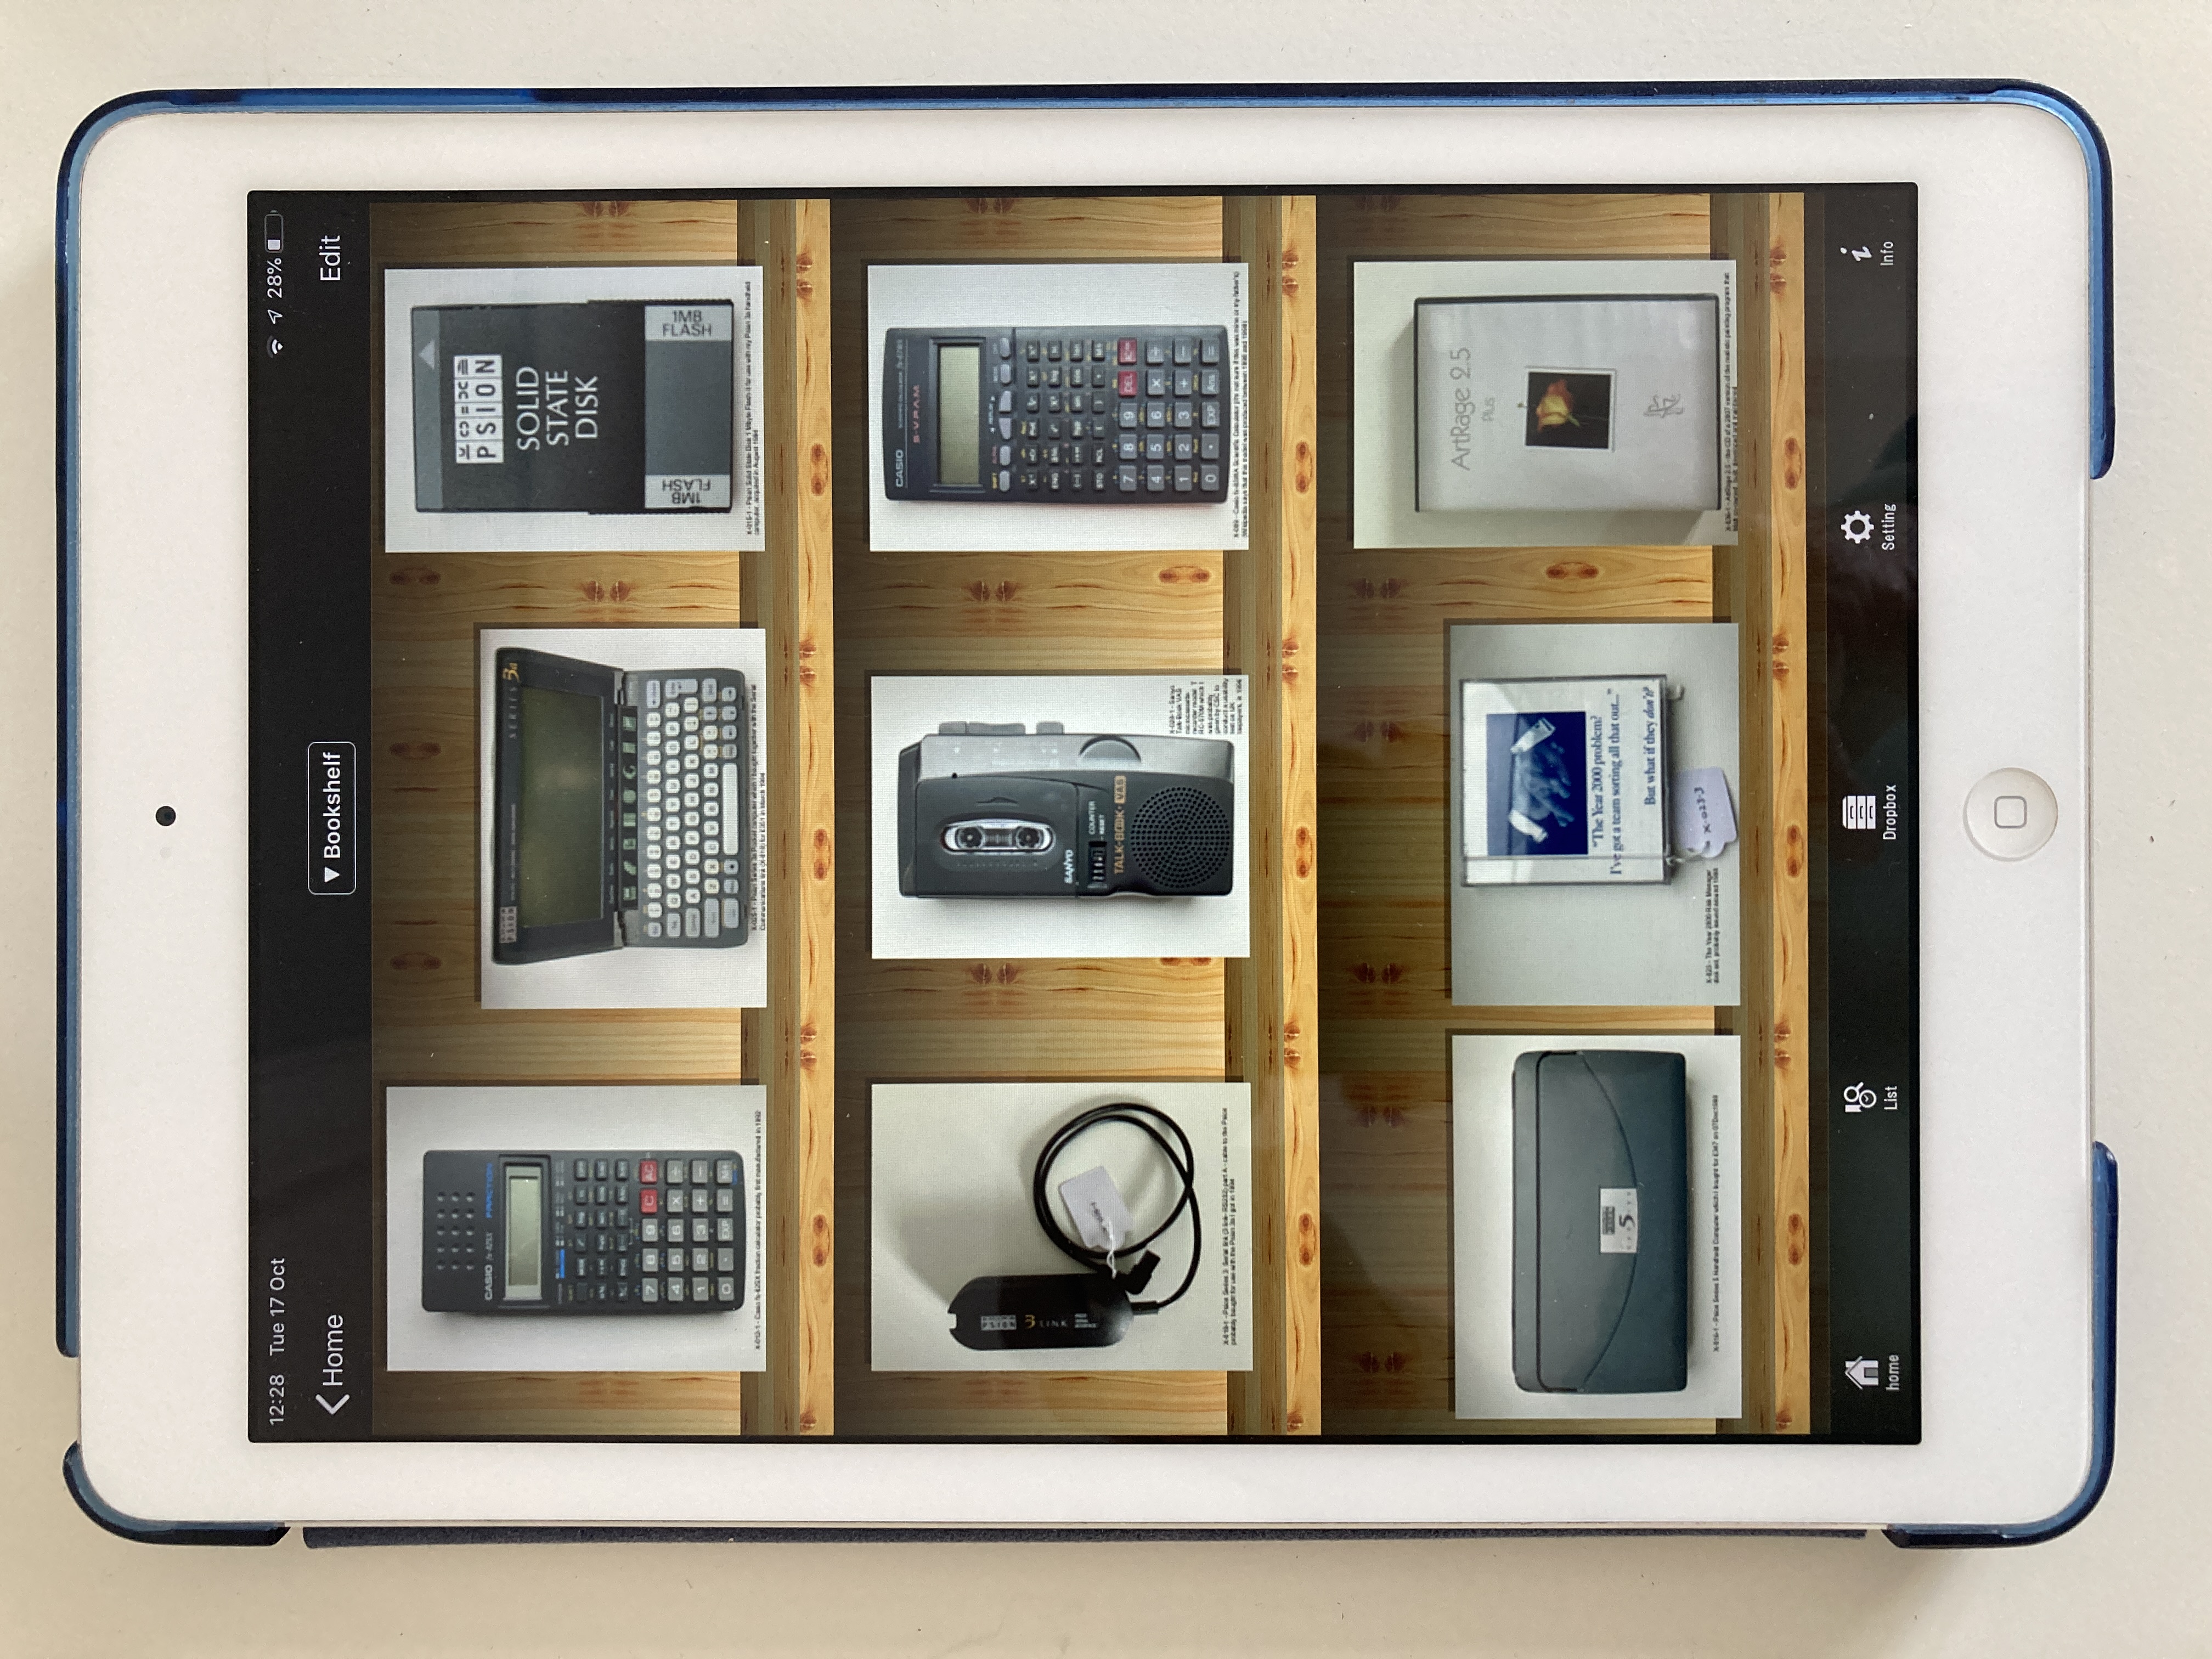
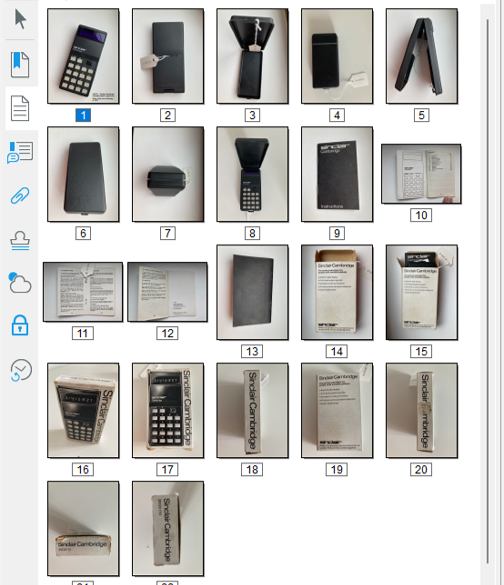
I personally think that an Index is essential when operating this kind of loft system. Having tried operating an index on both a laptop and a mobile phone, I would definitely advise having one on a mobile phone since it can be taken with you and used on the spot when you access items, change their positions, and make changes to their contents. A variety of suitable database apps are available (see my earlier posts on this issue), most of which will enable you to specify whatever fields you want. The fields I am currently using are: Description, Type, Item Serial Number, Container Serial Number, Position Serial Number, Item Category, Item Owner, Item or Container condition, Container this Item or Container is placed in, Position this Item or Container is placed in, Date this record was created, Container Security Status, Date removed from loft, Photo. I believe a photo is essential – and, of course the app should enable you to use the mobile phone’s camera to capture the image.

I try to ensure that every object in each Positions is included in the Index – unlabelled objects may get forgotten about and effectively lost. I also try to ensure that all changes to Containers and Items are reflected in the Index; and, indeed, the flexibility of the Index makes it easy to accommodate such changes – you just have to be diligent and remember to make the changes. However, being the humans that we are, we sometimes forget, and we often make mistakes – as described in the next section.

Errors in operating the Index

I’ve made many errors in the course of using our loft system, and perhaps the most common has been simply not updating the Index when a change has been made or an Item has been removed from the loft. This problem is often exacerbated when other people (such as offspring!) who are not so aware of the system or committed to its upkeep, are involved. However, even when I have remembered to make changes, I have sometimes updated records incorrectly. Indeed, I know I have actually created some Index records with incorrect information, though, so far as I know, I have only duplicated an Item number once.

In short, unless you are super diligent, you will probably make some mistakes in the course of operating a loft system. Therefore, it is useful to do a stock check from time to time – maybe every five years or so. Doing so also provides a useful opportunity to reassess whether you do actually want to continue to keep storing some of the items being checked.

General Approach and Best Practice

  • Find an Index app for your phone.
  • Specify the storage area and the positions within it.
  • Index the positions and label them.
  • Try to enclose Items to be stored in some container or packaging to prevent dust and rodent damage.
  • Record every Item being stored, in the Index.
  • Where items consist of many of the same objects and are to be stored for the long term, combine the objects and their container into a single Index Item.
  • Include a photo of every Position, Item and Container in the Index, but keep a separate set of Photos elsewhere in case you need to change apps (exports are usually available in transferable csv format which is unlikely to include photos).
  • When changes occur to the physical Items and Containers, make the associated Index changes immediately on the phone.
  • Undertake a stock check every 5 years or so and while doing so consider disposing of unwanted Items or Containers.

Conclusion

I’ve found our Loft system to be a very useful and effective way of storing the large number of things that we don’t need on a day-to-day basis. However, it does take time and effort to set up; and it does need diligence to keep the physical space in order and to keep the index up to date with the changes that are made. The mobile phone has made operating such a system a much more practical proposition.

The Brave New MD World

I started looking for a replacement for my uGrokit app with a search for ‘simple database apps for the iphone’. The first hit that came back was iDatabase on the app store, and when I looked at that, the app store also suggested Collections Database, easyAsPieDB Database, Formbook, HanDBase Database Manager, and Memento Database. After doing a bit of netsurfing to find out as much as I could about them, I decided that Memento Database would be worth a try, so I downloaded it and imported the first 5 records, then the next 5 and then the next 20. At that point I decided this was probably going to work for me, and loaded up the other 120 or so records. This wasn’t a particularly scientific process, but I suspect its fairly typical of the way apps are selected from the huge number that are available. I had no desire to do detailed analyses for days and days: I just wanted something that works.

The key characteristics that made me decide to go with Memento Database (MD) were the ability to:

  • create and edit fields at will, and to easily reorder them using finger movements;
  • import data in csv format;
  • search across all fields very easily and quickly;
  • take photos from within the app;
  • export records in CSV format;
  • just have a local copy at no cost.

Interestingly, the one thing I’ve found really difficult about MD is trying to ascertain if I can really use it for free, or if at some moment my iPhone/mobile account is going to get charged. The problem is that the current ‘Free’ plan I’m on is limited to 100Mb storage, but it’s not clear if that 100Mb is for cloud storage or not. For now, I’m assuming it must be for cloud storage because the iPhone says that this app is taking up 4.67 Gb of which 4.63 Gb is being taken up by Documents and Data. I don’t understand this sizing as it works out at over 29Mb for each of the 155 records – very strange. Anyway, I shall continue to use the app locally and will keep my fingers crossed that it doesn’t lock me out at some point in the future. If that should happen, I’d have to decide whether to tie myself to the £35 a year charge, or whether to look for a replacement.

The process of getting the data from my uGrokit app into the MD app was particularly tortuous, and demonstrated how important it is to retain collection data in a transferable format. The uGrokit app would, on request, send a list of all the data in the body of an email as in the example shown below:

  • Description:                                   Numark TTUSB Turntable with USB interface
  • Type:                                             Item
  • Item Serial No:                              285
  • Container Serial No:                     Not a container
  • Position Serial No:                        Not a position
  • Item category:                               Hi-fi & video equipment
  • Item Owner:                                  Paul
  • Item or Container Condition:        Good
  • Container this Item or Container is contained in: No container
  • Position this Item or Container is placed in:         P4
  • Date this record was created:     12/10/2016
  • Container security status:           Closed
  • Date removed from loft:              (no Date removed from loft)
  • EPC:                                           (none)
  • image key:                                  2016_10_12_07_00_14_07668572.png

I had to put this material into a spreadsheet and save it in csv format in order to import it to the MD app. I made several different attempts to do so including using Excel’s ‘Get data’ function which I couldn’t understand; and copying and pasting chunks and deleting unwanted material. I ended up just copying and pasting the description and then manually filling in the necessary fields (the ones underlined in the example above). I did this on my laptop in tranches with a small number of records in a spreadsheet to start with and then, as I grew in confidence with the app and the process, I increased the number of records until all 155 had been dealt with. As I did each spreadsheet, I emailed it to myself, picked it up on my  iPhone, saved the file to the iPhone’s file system, and imported it from there into the MD app. As I did each import, I discovered foibles of the import process which I was able to address in subsequent csv spreadsheets. For example, apostrophes in the description text (such as “from Paul’s study”) resulted in the text following it being placed into a new record; so, once I figured that out, I eliminated apostrophes from subsequent spreadsheets.

As I compiled the spreadsheets, I was also able to eliminate items that had been removed from the loft: when I designed the uGrokit database I had included a ‘Date removed from loft’ field rather than opting to simply delete the item concerned, because I wanted to have certainty about what had been there and when it was removed. However, with this new app my priority was to keep the number of records down in case I should surpass a charging threshold, so I elected to eliminate items that were no longer in the loft. For the same reason, I did not include the records (including photos) for each of the 32 Positions in the loft (which had been included in the uGrokit database).

Once all the records in the last uGrokit email had been included, I then had to manually create entries in a final csv spreadsheet for the 24 new items that had been added after the last uGrokit email had been sent in January 2023.

Finally, all the spreadsheets were finished and the information imported into the MD app. However, the records from Ugrokit had come with only image file names and not the images themselves, so I then had to go into the loft and take a photo of each of the 155 items. Despite being a laborious exercise, it actually doubled as a useful stock check as well as enabling me to rectify errors in the Position information.

The loft database is now complete and fully operational as a Local ‘Library’ in the MD app. So far, I haven’t been charged anything or been asked to upgrade. The app seems to do everything I need it to – though, of course, time will tell. It has just three flaws that I can see at the moment:

  • As already mentioned, the records in the app are taking up a huge amount of storage (some 29Mb each) which I don’t think can be attributed to the photos. I don’t understand this and fear it might have unpredictable implications.
  • When entering the Loft ‘Library’ the records are displayed underneath a search bar and a field title bar. However, when you scroll down the records, they scroll up over the field title bar and the search bar and off the top of the screen. It’s not a critical problem – but its not what I would expect.
  • Scrolling through the records quickly can be a little hesitant as though the processor is having to work excessively. This is even more pronounced when the photo field of the records is displayed (there is only room for the first 6 fields to be displayed when the iphone is held landscape, so the photos only get displayed if you scroll to the right and then scroll up and down). In fact, not all the photos appear as the records are scrolled through – some of them just have time circles until they appear. Perhaps this issue is simply because I’ve got a relatively old iPhone. However, it doesn’t really concern me because I would rarely scroll through all the records. My useage is almost entirely based around searching for a particular item.

These issues – particularly the first one – are a little disconcerting; but having gone to all the effort to populate my loft database in the MD app, I’m not inclined to do further investigations right now and to potentially have to go through it all again with another app. Instead, I’ll wait and see how things go – and in the meantime export a copy of the MD Loft database, as well as saving a copy of every photo to my iPhone photo library: I’ve learnt my lesson about retaining data in a transferable format. I have retained my old uGrokit loft database on my iPhone: there seems no particular reason to delete it until I have to. However, all additions and changes will be made in the MD app going forward. I’ll report back on how things work out with the new app in a year so.

EOL and RFID

It’s been over 8 years since I wrote the last entry for this particular journey and started using the uGrokit iPhone app. Since then, the app has worked reliably for me across at least two different iphones and provided easy to access information about the 180 or so objects in our loft. However, a year or so ago, the facility to have a backup email sent listing the contents of the database, stopped; and soon afterwards my local version stopped synching with the remote cloud copy. Investigations revealed that the uGrokit company had been acquired by Turck (a German international supplier of factory and process automation technology) in April 2017, and that the uGrokit app was now EOL (End of Life). I had truly taken my eye off the ball. Turck continues to sell the U Grok smartphone readers but, instead of a ready built app, it provides a software development kit for users to build their own databases.

This is a classic digital preservation problem for collectors using technology to support their activities: you have to keep abreast of the technology or risk losing access to your digital content. It’s demanding enough to have to do this in a commercial enterprise; but for a private individual it is an unwanted responsibility easily brushed under the carpet.

Anyway, I realised that I needed to get on and do something because, although the uGrokit app continued to work OK on my iphone, there is no guarantee that it will stay that way, or that it will work when I upgrade my iPhone; and there is no longer any support operation that I can call on for help. Furthermore, any new entries I make in the app will be locked in the app and not downloadable to another format which can be reused in another system.  For all these reasons I decided it was time to find another iPhone app.

A key starting point was the question about RFID. As can be seen from my previous post in 2016, it had been my intention to try to acquire a uGrokit Reader and to try fitting RFID tags to all my loft objects. Well, I did try to do that but nothing came of it. I couldn’t acquire a reader on loan or second hand, and I couldn’t really justify the full price spend of £395 + VAT. Meanwhile, my uGrokit app was working very nicely. I lost momentum and abandoned the idea. Now, however, I needed to be clear if RFID was going to be on the requirements list for the new system I was going to look for. Interestingly, the answer was quite clear: No!

Over the last 8 years I have come to realise that adding an RFID capability would not improve my loft system for the following reason: the position of each loft item is specified in the database; and each position is about three feet wide and 5 feet deep. Most objects are either fairly large in their own right, or else in a container like a case which is also fairly large: so, it is relatively easy to find an object when you know its position. When I want to find an object, I find its position by looking at the app, and then go into the loft armed with that knowledge. Having an RFID reader to point at the object once I get to the Position wouldn’t really make it any easier.

On top of this fundamental fact that I don’t actually need RFID to control my loft objects, there would be a whole lot of extra work to do to implement an RFID system. RFID tags would have to be bought and attached to each object. The tags can be either active with a power source such as a battery, or passive which reflect energy from the reader. I wouldn’t want to have to supply and keep replacing batteries so I would be using passive tags – UHF (high Frequency) passive tags (which can operate up to about 20 feet) as opposed to HF (Low Frequency) passive tags which only operate up to about 3 feet. The tags come in all shapes, sizes, prices, data storage capacities and ways of attaching them to their objects; so, I would have to undertake a selection exercise or be tied to the tags provided by the card reader supplier. The tags would also have to be programmed to identify the objects they are attached to. Special tags may be required for metal objects; and apparently metal objects (such as the TV arial in my loft) can affect the RFID signal.

Given all these complexities, I’m glad I don’t need to go down the RFID route. My tags are white Strung Tie-On Tags which cost about £3 for 100, and I already know how to tie the knot when I attach them to an object. I programme them by writing the Item Serial No on both sides of the tags with a black felt tip pen.

Back to the list of requirements for my replacement Loft app. These are the things that immediately spring to mind:

  • It must operate on an iPhone.
  • It must enable me to specify the fields I require
  • It must enable me to take photos of objects from within the app
  • It should be free or very cheap to use
  • It should enable the export of the data to a csv file (for backup or transfer to another system)

With these points in mind, I set about looking for a suitable app. The following post documents how I got on.

Choosing Rationales

Having explored the conversion of physical DVDs, engineered the delivery of the resulting files to the  lounge TV, and experienced a few of the titles on its delicious 65-inch OLED screen, I set about deciding which DVDs I was going to hang onto. I ended up choosing to keep 20 of the 58 titles with the files totalling around 40 Gigabytes. One of my concerns when I started this journey was that the files produced would be too big to handle and, overall, would take up too much space. However, after adding this extra 40 Gb I still have 135 Gb of free space on my laptop which I consider to be sufficient for at least a few more years. The files themselves range in size from 670 Mb to 3.3 Gb – which is certainly very big; but at least there are only a few of them. In any case (I say to reassure myself) size is a short-term problem, as storage capacities continue to increase.

My rationale for keeping particular titles seem to fall into one or more of the following 5 categories:

  • Watchability – productions that I can enjoy watching over and over again.
  • Sentiment – productions that remind me of good times in the past or that I have a personal connection with.
  • Spectacle – productions that are just awesome to watch with their extraordinary images and ambitious content.
  • Instructive – productions that provide interesting and intriguing information.
  • Music – productions that contain memorable songs or other excellent music.

This collection of files on my laptop would now appear to be a collection of my most favoured moving image productions; but, of course, it is not. They just happen to be the productions I particularly like in a set of DVDs that we just happen to have. A true collection of my favourite titles would entail trying to remember which items I have seen over the last seventy years that I liked best – an extremely challenging exercise. Finding and acquiring those items would probably be equally as challenging; nevertheless, it would probably be an enjoyable and rewarding hobby. However, I’ve never heard of anyone doing it in such a thorough way; only people who have collections of videotapes of a favourite TV series; or of DVDs. The reason is that moving image titles are dependent on modern technology – technology that is either transient like TV, or changing like cine/videotape/DVD. Books don’t have that problem: when people get a physical book, they can just keep it if they like it and they build up their collection of favourite titles over the years. Interestingly, the same has been true for physical DVDs. However, now that moving image has become a standardised software object, it’s possible that more people will gradually build up their collections of digital video files over the years. However, a physical book/DVD has a tangible presence in the world, whereas a software file is just about invisible. Furthermore, we now consume far more moving image material on a daily basis than we do physical books. These two distinctions means that our collecting habits associated with physical and digital media will never be the same.

Following this line of reasoning, I think it unlikely that I will start to add extra items in the future to my new collection of moving image productions. I might include the odd item in the Videos folder if it comes along in the right format and I particularly like it; but I won’t be making special efforts to capture material I enjoy on a regular basis. The collection will stay pretty static over the coming years, and may or may not get dipped into occasionally. As for the physical DVDs from which I have created the software files, I will keep those packaged away in a box in the loft. Not because I will ever play them again, but because I want to have some proof that I did actually purchase the DVDs which I ripped to produce the files: it is certainly illegal to make a copy of a DVD you don’t own.

What makes a DVD worth keeping?

I started assessing each of my DVDs several weeks ago and found myself splitting them into three groups: definitely keep, definitely dispose, and need to watch to decide.  I’ll provide a summary of my conclusions and associated rationales, in a later post. First, however, I want to go into some detail about two DVDs in that final, ‘need to watch to decide’, category because I think they highlight many of the key points about keeping DVDS. They are the two sets of DVDS of the London 2012 Olympic and Paralympic Games. The Olympic games set consists of 5 DVDs (approx. 15 hours running time) produced by the BBC; and the Paralympic set has three DVDs (approx. 7 hours) produced by Channel Four. I had Blu-Ray versions of both which my DVD player will not play. So, I bought ordinary DVD sets in eBay. This is a salient point about DVDS: they were very cheap – just £3.18 and £1.99 respectively inclusive of postage.

To provide the context for my subsequent remarks, you should be aware I’ve been a big athletics fan all my life. I did athletics at school, culminating in doing a decathlon at university. I also used to live next to Stoke Mandeville Hospital where the paralympics movement was born, and I took my young children out onto its track quite regularly. So, having the Olympics come to the UK in 2012, was a dream come true. I attended the Torch procession as it made its way through Aylesbury; and I got tickets to the Rowing, Boxing, Table Tennis, and the evening in the Athletics stadium when Rudisha broke the world 800m record and Bolt won the 200m. For the rest of the time, I watched the television coverage. It was all high octave and memorable. I specifically asked for the DVDs as birthday or Christmas presents because I knew I’d want to watch it all again. But I never did. They just sat on the shelf and my memories remained fond but grew dimmer. Until, that is, It came to this point at which I have to decide if it’s going to be worth keeping at least 8 very large files.

The first thing to say is that the Handbrake conversion was trouble free and produced results which had nothing to indicate they weren’t being played directly from the original DVDs. Secondly, streaming it over the home WiFi into the TV in the lounge from my laptop upstairs in my study also worked without a hitch: I just had to make sure that the power saving settings on my laptop were switched off to prevent the machine closing down during the running of the DVD. Thirdly – and this is a significant point – I found that being able to watch a spectacle like the Olympics on our large 65-inch LG OLED screen is an order of magnitude better than watching on a smaller screen. The screen size and clarity doesn’t just enhance the experience; it turns it into something much closer to a lived experience.

Now, let’s talk about the contents: the sport, of course, is the focal point of the Olympics and Paralympics, and it is undoubtedly very good to watch again – especially as only the highlights of the many days of competition are included. However, the sport is sandwiched between Opening and Closing ceremonies for both Olympics and Paralympics, and these were extraordinarily good. I had forgotten just how good. The themes, the costumes, the lighting shows across the seating areas, the ability to bring on innumerable well-known musicians and other celebrated people (including Stephen Hawking and Tim Berners-Lee), the innovative and daring expositions of our culture – well, it was all breathtaking. The Olympics Opening ceremony actually had a cricket match being played adjacent to a field with sheep in, and another field with wheat in which was being hand-cut – really; and shortly afterwards all that had been replaced with large factory chimneys. And so it went on, the standard being maintained across all four openings/closings. The scale of the productions and the coordination required across hundreds of performers and many different elements (including lighting, performers on wire suspensions, sound, and stage prop movement) was hugely demanding and yet seemed to be carried out flawlessly (though there must, surely, have been some hiccups?). The amount of design work that had been undertaken to underpin the final results was illustrated in one short extra file explaining the thinking behind the ‘House’ scene in the Olympics Opening ceremony in which the last 50 years culture of a typical family is represented over 10 minutes with laser projections onto the house.

With the big screen exploding with activity and colour and the sound turned up to reproduce the roars of the crowd, I became immersed in these 22 hours of extraordinary entertainment. I had forgotten most of the detail of the opening and closing ceremonies so I was reliving and enjoying the experiences again as though they were new. Having watched the Paralympics Closing Ceremony yesterday afternoon, I feel as though I’ve just attended the whole 2012 Olympics/Paralympics again; and what a time it was. It demonstrated the huge depths of creative talent the UK has across many different disciplines; it recounted our history and our culture – an open, caring, supportive, and inclusive culture; and the thousands of volunteer helpers did a magnificent job looking after the visitors to the games. It was a massive, triumphant, success; a platform for the nation to move forwards still further in creating a happy and prosperous society. Such a shame that it was all thrown away in the ensuing ten years. However, that’s by-the-by. The point is that I feel I’ve relived the whole extraordinary experience; and perhaps that’s what we want out of a DVD that we might want to watch again. We want to take what we considered to have been an extraordinary experience, and to be able to relive it and to recapture those feelings again.

The Physical Display Case

Over the last 24 hours I’ve been curating an exhibition of vintage computer artefacts. Well, not really. In fact, I’ve just been repopulating the display case that I emptied when I moved it. But I have tried to apply a bit of rationale to my selections to try and get a bit of an understanding of the issues that real curators face. As is evident from the images below, this has resulted in a significantly different display from that which was in place previously.


I deliberately chose to make the new display a lot less cluttered to enable viewers to settle their eyes on just a few specific items. However, this inevitably led to what is, I guess, one of the main challenges that curators have – having to make difficult choices not just about what to include but also about what to leave out. Following on from the selection activity, I encountered a variety of other curation issues including:

  • Having to go to and from the storage area (in my case, the loft) to collect different items is a time-consuming and irritating process (my selection decisions were taken on a shelf by shelf basis).
  • Having limited shelf space means that some topics, or groups of artefacts, that would be desirable to include, simply can’t be accommodated.
  • Sometimes a choice has to be made to either put like objects together regardless of the date they were made; or to keep items from the same rough date of manufacture, together.
  • Stands or other mechanisms are required to enable objects to be displayed upright instead of lying flat on a shelf.
  • Items at the front of shelves can obscure items at the back of shelves.
  • Shelves closer to the floor are more difficult for the viewer to see to the back of, or to inspect closely.

As for providing descriptions – well that’s another level of complication I haven’t ventured into. I imagine it would significantly reduce the space available for artefacts; and decisions would have to be made about how much information to provide. My let-out for not providing descriptions is that some further information and extra images are available in the digital display on the iPad.

The job of a curator clearly requires a wealth of knowledge, skill, and experience. Right now, I’m on the very lowest rungs of that ladder.


The Digital Display Case

While I was cataloguing and marking the items in the display case collection, I took the opportunity to photograph each one. Not just a single photo; multiple digital images taken from different angles so that viewers could get a feel for all aspects of the object.

Of course, proper 3D images would have been preferable – but I don’t have the equipment or the focus at present: I want to get on with this journey and get the newly moved display case back in action.

The destination for this digital version of the collection is the iPad app, SideBooks, which I have used to display objects emanating from many of the different OFC journeys, and which makes it easy to import files by providing a specific option to download from DropBox (a Dropbox account is easily set up and free to operate at a small scale). Uploading and downloading to and from Dropbox is very quick through a modern broadband connection. SideBooks displays the first page of multiple PDF files in a bookshelf format (with a selection of themes) which can be expanded or reduced to show more or fewer items accordingly, as illustrated below by a view of the complete display case collection next to a much-enlarged version.


In this digital version of the collection, each item is represented only by a single file regardless of how many individual elements it comprises. For example, the Sinclair Cambridge Calculator is accompanied by a plastic case, an instruction booklet and the cardboard box it was packaged in. Multiple images of each of these four items are all contained in a single PDF file, even though they are each individually catalogued and indexed. This is achieved by assigning an overall reference number to the set of related objects (X-002) and by assigning sub-reference number to each object: X-002-01 for the calculator, X-002-2 for the plastic case, X-002-3 for the instruction booklet, and X-002-4 for the cardboard box. Each of these individual items has its own PDF file containing the relevant set of photos, and these are the master digital files associated with the index items. However, for the purpose of the digital display in SideBooks, all the images contained in each of the four PDFs are collected together in a single PDF file titled “X-002 – Sinclair Cambridge Calculator which I gave to my father, Fred, for his birthday in 1977.pdf” as shown below.

In cases in which an object has no associated elements, there is no need to use sub-reference numbers, and the same PDF file can be used as the master digital file and the file for display in SideBooks, for example “X-019 – Blackberry Bold 9700 similar to the one I started to use in CSC in 2009”.

This approach to indexing has been specifically designed to accommodate the capabilities of the digital display application that I am using – SideBooks. If some other mechanism is used, an alternative design may be appropriate. SideBooks enables individual items to be selected and then for each page of the PDF file to be leafed through. Consequently, each photo has been given a separate page in the PDF file. Some brief information about the contents of each PDF is provided at the base of each of the first photo in each file. A more thorough approach might label every photo in every file, but I didn’t think there would be sufficient benefit to make it worth the effort. A more worthwhile exercise would be to provide a short narrative for each object, telling the story about what it is and how it came to be in the collection. This could be provided on the second page of each PDF; and perhaps also delivered as a spoken word sound file which could be selected and played. Such a sound file might also be used to augment the physical display if viewers were able to verbally request that it be played – “Alexa, play X-019”.

It’s worth noting that the physical display case used to present objects in this collection is too small to accommodate all the items at once; whereas the digital display mechanism can display all the items. This is the obvious but significant difference between physical and digital displays of larger collections: all items in a collection can be made accessible digitally, but may be too great in number to be presented physically to the viewer. Having said that, ordering the presentation of items in a digital display may require further effort. SideBooks presents files in the alphabetical order of their file names, which, in this collection, always start with the Reference Number. However, the allocation of Reference Numbers is random; the next item gets the next available Reference Number. Consequently, the items of this collection were somewhat mixed up when the files were presented in SideBooks, whereas I wanted to have all the computer-related items together followed by all the personal items, and ending with the items associated with our visits to four special restaurants. To achieve this ordering, I added a further set of numbers to the beginning of the filenames in Sidebooks, for example, “X-019 – Blackberry Bold 9700 similar to the one I started to use in CSC in 2009” became “SB42: X-019 – Blackberry Bold 9700 similar to the one I started to use in CSC in 2009”. The need to add such numbers is a little irritating, but necessary with this particular digital configuration. SideBooks does allow searching of the filenames – but this can only be done across all the different collections in SideBooks, which, in this case includes many hundreds of mementos, books and papers; and I don’t believe it alleviates the need to deliberately order the digital presentation of the objects.

The ability to have the whole collection on hand in the highly portable iPad is a great advantage – especially when it comes to wanting to take a look at items that haven’t been viewed for many months or years. The sheer accessibility of this combination of slim and lightweight tablet and highly visible software interface, provides a very useful and useable way of keeping a handle on what is in a collection.

Storage Strategies

I had previously kept the packaging for my display case items in a squarish cardboard box measuring 44x44x37 cm. As I emptied the display case and catalogued the items in it, I continued to use the box, piling the items on top of one another, and then removing them to investigate marking mechanisms and to come up with photos used in the previous post. The more I removed, replaced, and searched for items, the more I realised that this storage box was not effective. Smaller items would have to be gathered together into single containers; groups of containers would have to be stored in drawers; and items and containers would have to be placed in numerical sequence. With these principles in mind, I set about amalgamating groups of items into single boxes. The result is shown in the before and after images below.


I then set about trying to find some cheap stacks of plastic drawers, but couldn’t find any with suitable dimensions (they would have to accommodate the largest item – the packaging for a ZX 82 computer, measuring some 36x21x10 cm: the brown box in the second line of objects in the photos above). However, when I was in IKEA buying a new bookcase, I did find something that I thought might be big enough, for just under £30. I took a chance and bought it, but, as can be seen in the image below, it was too small and couldn’t accommodate the items sitting on the top. The answer was to stand a plastic storage box on the top. Labels for each drawer were secured in tightly behind the corner strut of each drawer; and, for the transparent box, was lodged inside against the outward facing side wall.


My plan was to locate this storage facility in my loft, and on this occasion, I got lucky; the gap between the loft rafters is some 1.5 cm wider than the rack of drawers so it fits between them perfectly.


Having got all the items stored away, in order and easily accessible, I am now able, at my leisure, to select which one’s I want to put in the display case at any one time.

Marking and Labelling experiences

The Collection Trust booklet provides very specific guidance on marking items. It advises that items are labelled and marked in ways which are:

  • Secure – The chances of accidental removal of the label or mark from the object
  • must be extremely low.
  • Reversible – It should be possible for a label or mark to be removed intentionally
  • from an object, even after 50-100 years with as little trace as possible.
  • Safe for the object – Neither the materials applied to the object nor the method by
  • which they are applied should risk significant damage to the object.
  • Discreet but visible – The recommended methods should not spoil the appearance
  • of the object, nor obscure important detail. However, the number should be visible
  • enough to reduce the need to handle the object.

For the positioning of labels and marks it suggests that you should:

  • Avoid physically unstable surfaces. Also avoid placing labels or marks across a line
  • of weakness or fracture.
  • Choose a position so that the number is unlikely to be visible when the object is on
  • display but is accessible in store.
  • Avoid decoration and painted/varnished/pigmented/waxed areas.
  • Avoid surfaces where the mark is likely to be at risk from abrasion, such as surfaces
  • on which it normally rests, or where touched during handling.
  • Locate the number so that the handling necessary to read it is minimised (consider
  • marking the packaging or adding an extra tie-on label as well).
  • With composite objects, mark the part on which the most secure method can be
  • Where duplicate marks are made these should be in different positions on the object
  • (bearing in mind, of course, the other principles listed above).

And for writing on objects, it recommends the following:

  • Apply B72 20%-in-acetone as a base barrier coat on the object.
  • Write the Ref. No. with a permanent black or white marker.
  • Apply B67 20%-in-white spirit as a top coat.

Should a mistake be made, this combination can be easily removed with acetone.

I duly searched the internet and found several suppliers of these items. In the end I bought small bottles of 20% B72 and 20% B67, a bottle of acetone, and a fine marker pen for about £20 from ZOIC PalaeoTech Limited.

After a couple of tests applying base coat, pen, and top coat, I set about removing the items from the cabinet, matching them up with any packaging etc. that had been stored separately, and creating relevant index entries.

Guidance on drying times for base coat, pen, and top coat, ranges from a few minutes to 24 hours. I chose to try to space out each part of the process by at least a few hours, and then it soon became apparent that I needed some systematic way of knowing which items were at which stage of the process. My answer was to have separate adjacent areas on my desk for each stage, so that the objects would progress from right to left.

Use of the B72 and B67 solutions wasn’t difficult; the brush applicators built into the bottle tops make it easy to apply a line in a single stroke. However, my nose certainly did pick up the strong odours emanating from the bottles; advice on open windows and, possibly, wearing a mask is worth taking note of.

Decisions on whether to use either a black marker or a white marker were easily made based on which one would stand out best on the relevant background. However, marker pens were certainly not the only way I labelled items. My preferred option was to used stringed labels whenever I found a way of attaching them: of the 223 separate objects dealt with in this exercise, stringed labels were applied to 134 of them, while Ref. Nos. were painted onto only 51.  The table below summarises all the different labelling techniques I used across the collection.

Did I follow the advice in the Collection Trust booklet? Well, broadly speaking, yes when painting-on the Ref. Nos. or using stringed labels. However, for the 12% of items on which I pencilled-on the Ref. Nos. I suspect I wasn’t following best practice; and, as for the use of Post-IT notes, well I know myself that they come away very easily. In my defence, all of the Post-IT items had been previously labelled in that way and I saw no better way of labelling them. The final category in the table above – ‘No Ref. No. applied’, is of course completely contradictory to the guidance. However, there were good reasons for not labelling each of them: one is a SIM card that is just too small to write on and, in any case, is unlikely to be lost as it is located inside an iPhone; another is the commemorative coin shown in the table above, for which a painted-on Ref. No. would certainly detract from its quality. A similar rationale applies to the tooth shown in the table – it is too small and irregular to have a Ref. No. painted-on, and even the string of a label wrapped around it would obstruct its inspection. The  final items are three pieces of terracotta pottery which, according to the marketing letter accompanying them, are supposed to have just been found in the desert sands – a claim which would not stand up if a Ref No. appeared on them in any shape or form.

Regarding my use of stringed labels, I found a variety of different ways of attaching them, as illustrated in the table below.

Although I felt my use of stringed labels was quite successful, I did realise half way through the exercise that the cotton thread I was using when I needed longer string lengths, was not strong enough and might easily break if caught or pulled; and in any case might deteriorate over time. This prompted me to look for archival quality thread and stringed labels, and I duly acquired them for about £15 including postage from Preservation Equipment Ltd as shown below. I shall use them to swap out the labels I have already applied, at some time in the future.

Indexing Arrangements

If I was to catalogue all the items as I removed them from the Display Case, I needed a clear indexing regime. There seemed to be two options; either to create a separate index, or to include the items in one of my existing indexes. I have some experience to draw on in making this choice. In my earlier work on Mementos, I’ve set up an index for my own personal items (with a Ref. No. prefix of PAW), and another index for items special to both myself and my wife (with a different Ref. No. prefix). For the most part, this separation has worked fine, but occassionally I’ve forgotten which set an item might be in, and I’ve found myself having to check both indexes. In fact, I’ve concluded that it will be better to merge them at some point in the future, especially as both indexes have the same fields, and the different Ref. No. prefixes will ensure uniqueness.

In fact, this assembly of different sets of material in the same index has already been shown to work in my PAWDOC work filing system. This includes many different types of items ranging from documents to ring binders and 35mm slides. All have different Ref. No. prefixes which not only ensure uniqueness in the numbering system, but also enables different sets to be stored in different places. The PAWDOC filing system has been stress-tested for over 40 years and has demonstrated that this approach does work in practice.

Taking all this into account, I decided I would simply add these display case items to my personal PAW mementos index; and that I would employ the prefix ‘X’ in front of the reference number. I chose X because I wanted to make the Ref. No as short as possible, as easy to write as possible, and as clearly distinguishable as possible, because I anticipated having to mark some of the display case items in small font with a marker pen.

I’ve always found marking items to be a bit of challenge. For many of the items in my document collection (for which there was no need to retain the integrity of the items), I was able to just write the Ref. No. onto the top left of the document. However, sometimes there wouldn’t be enough empty space to write in the Ref. No., or the material wouldn’t absorb the felt tip pen ink. In these cases, I wrote the Ref.No. on a rectangular piece of paper with adhesive backing and then stuck it onto the item. For the items in my loft storage experiment I’ve used stringed labels, though sometimes it’s been difficult to find a way to attach them: and for the memento collections already mentioned, I’ve been using cut pieces of Post-IT notes which have an adhesive backing which peels off very easily. This last solution ensures that the items concerned are not defaced – but I find that many of the labels simply come off in the course of handling the items, turning pages, or with the passage of time.

For this exercise, therefore, I decided I would try and do it properly and find out what the professionals do. On trawling the net, I quickly found a very useful Labelling and Marking Booklet produced by The Collections Trust with the help of Vivien Chapman at the National Conservation Centre, National Museums Liverpool (NML). This advises that not only should you give a unique number to each accessioned object and securely label or mark it with this number; but also that all detachable parts of an object should be marked using suffixes to the Object number. The latter part  of this advice was of particular significance because some of the computer objects in the display case have accessories, documentation, and  boxes with removable inserts.

Having taken this advice on board, and sticking to the principle of keeping the Ref. No as short as possible, I decided on the following reference number scheme:

  • Use the prefix ‘X’ followed by a hyphen followed by a three-digit number starting with 001 where, for numbers less than 100, there are two leading zeros;
  • For single items with no detachable parts, use the next available number, for example, X-015;
  • For items with detachable parts, add another hyphen and follow it with a serial number with no leading zeros, for example, X-056-1, X-056-2, X-056-3. Note that, in this case, there would be no X-056: the main object would have the first of those numbers – X-056-1.

In addition to the Ref.No., the existing index I intend to use contains the following fields: Description, Facet 1, Facet 2, Publication Date, Earliest Year, Physical Location, Digitisation Method, Electronic Format, # of Digital Files, Creation Date, Notes. The Description field can contain any text unconstrained by length. This is how I shall be indexing the items in the display case and all their accompanying accessories and boxes.